Why cooking white rice in a pressure cooker changes your routine
Cooking white rice in a pressure cooker transforms a basic staple into a reliable foundation for many meals. When you use an electric pressure cooker, you control pressure, water, and time with impressive precision, which means fewer failed pots of rice and more consistent results. This reliability matters when white rice is not just a side dish but the base for curries, stir fries, and rice bowls.
At its core, cooking rice in an Instant Pot or any modern pressure cooker relies on a simple ratio of rice to water and a carefully chosen cooking time. For most long grain white rice, one level cup of rice usually needs about one level cup of water in an electric pressure cooker, although some cooks prefer slightly less water for a firmer texture. Once you understand how pressure cook settings affect the minutes under pressure and the final texture, you can adapt the same method to different batch sizes without stress.
Many people hesitate before they first pressure cook rice, worried about overcooking or sticking. Yet electric pressure models are designed to manage pressure release and heat automatically, so the cooker does much of the thinking for you and keeps the grains from scorching. With a little practice, cooking white rice in a pressure cooker becomes as routine as boiling water, but with far better control over every cup you prepare.
Essential ratios, rinsing, and seasoning for flawless white rice
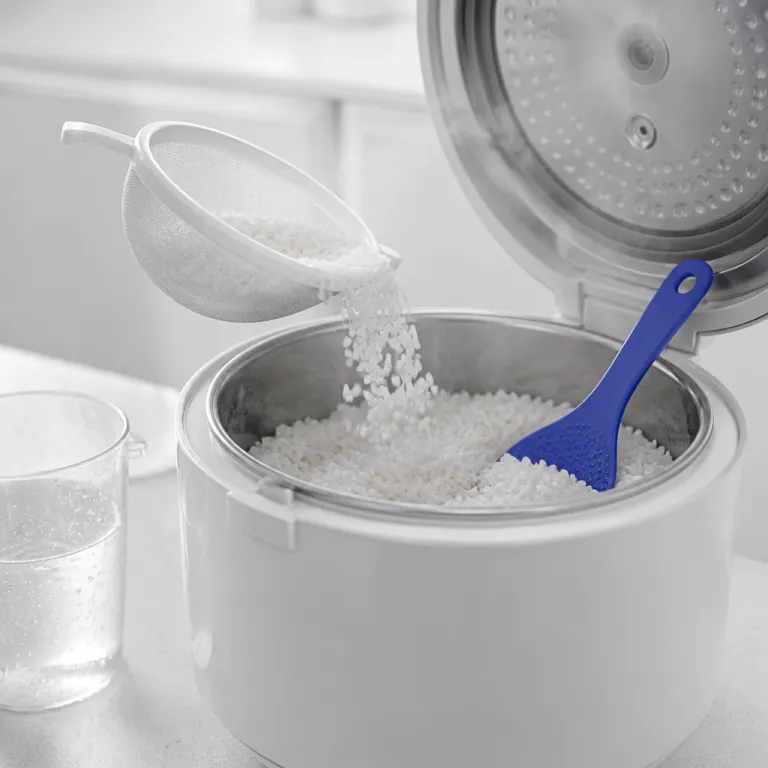
The most important step before cooking white rice in a pressure cooker is to rinse the rice thoroughly under cold water. Rinsing removes excess surface starch from long grain white rice, which helps each grain stay separate and reduces the risk of gummy, clumped rice. Swirl the rice in a bowl, change the water several times, and continue until the water runs almost clear.
For standard long grain white rice in an electric pressure cooker, a balanced starting ratio is one cup of rice to one cup of water, with a pinch of salt. If you prefer softer textures, increase the water slightly, while firmer rice benefits from a touch less water and a slightly shorter time under pressure. When you cook more than two cups at once, keep the same ratio but allow a few extra minutes for natural pressure release so the rice finishes steaming gently.
Seasoning matters as much as ratios. Replace some of the water with light chicken broth or vegetable broth to turn simple white rice into a fragrant side dish that pairs beautifully with grilled meat or tofu. If you enjoy aromatic flavors, you can also use garlic powder or dried herbs, and for more ideas on flavoring grains you can consult this guide on using garlic powder in a rice cooker for flavorful meals, then adapt the same principles when you pressure cook rice in your Instant Pot.
Step by step method for cooking white rice in an electric pressure cooker
To start cooking white rice in pressure cooker models, measure your rice carefully using the same cup for both rice and liquid. Place the rice in the pot, rinse until the water is nearly clear, then drain thoroughly so the final rice-to-water ratio stays accurate. Add fresh water or broth, a little salt, and if you like, a teaspoon of oil to reduce foaming during pressure cooking.
Set your electric pressure cooker or Instant Pot to high pressure, then adjust the cooking time according to the type of rice. For long grain white rice, most cooks use 3 to 5 minutes at high pressure, followed by 10 minutes of natural pressure release before opening the lid. Brown rice needs a longer time under pressure, often around 20 to 25 minutes, because the bran layer on each grain slows water absorption and cooking.
Once the pressure release finishes, open the pressure cooker carefully and fluff the rice with a fork to separate the grains. If you notice a little extra moisture at the bottom, leave the lid off and let the rice rest for a few minutes so the remaining water evaporates gently. The same method of careful timing, correct rice-to-water ratios, and patient resting also works when you branch out to other grains, and you can see similar logic applied in this guide on how to cook quinoa in a rice cooker, which you can then adapt for your electric pressure cooker.
Adjusting time and liquid for long grain, brown, and mixed rice
Not all rice behaves the same way under pressure, so you must adjust both time and liquid. Long grain white rice usually needs less water and a shorter cooking time than brown rice, because the polished grain absorbs water faster. When cooking white rice in a pressure cooker, start with equal parts rice and water, then fine tune based on your preferred texture.
For brown rice, increase both the liquid and the minutes under pressure, often using one cup of rice to about one and a quarter cups of water. Set the electric pressure cooker to high pressure for around 22 to 25 minutes, then allow a full natural pressure release so the tougher grain softens without breaking. Mixed rice blends, which combine white and brown grains, require compromise, so many cooks partially parboil the brown rice or accept a slightly firmer brown texture to protect the delicate white grains.
Instant Pot models and other electric pressure cookers sometimes offer dedicated rice programs, but you still benefit from understanding the underlying ratios. If your Instant Pot rice setting consistently produces softer or wetter rice than you like, switch to manual pressure cook mode and reduce the water slightly. Over several batches, you will identify the exact combination of rice, water, minutes under pressure, and pressure release that gives you reliable results for both everyday side dish portions and larger family meals.
Troubleshooting texture problems and avoiding common mistakes
When cooking white rice in pressure cooker appliances, most problems come from inaccurate measurements or rushed pressure release. If your rice turns out mushy, you probably used too much water or extended the time at high pressure beyond what the grains needed. Reduce the liquid slightly next time, shorten the minutes under pressure, and allow a full natural release so the rice finishes gently instead of boiling aggressively.
Dry or undercooked white rice usually indicates too little water or an overly short cooking time. In that case, add a small splash of hot water, return the pot to your electric pressure cooker, and pressure cook for one or two extra minutes, then let the pressure release naturally again. Avoid stirring the rice before it cooks, because agitation can break the long grains and create uneven textures, especially near the bottom of the pot.
Sticking and scorching often happen when there is not enough water or when starchy residues build up on the bottom of the pot. Rinse thoroughly before cooking, scrape the inner pot clean between batches, and consider adding a teaspoon of oil to reduce foaming and sticking. If you want to practice managing pressure and release without risking your main meal, try a simple vegetable recipe such as making tender corn on the cob in a pressure cooker, then apply the same attention to timing when you return to rice.
Turning pressure cooked rice into versatile meals and side dishes
Once you are comfortable cooking white rice in pressure cooker appliances, you can turn plain grains into fast, satisfying meals. A basic batch of long grain white rice becomes a neutral canvas for stir fries, curries, and stews, while leftover rice can be chilled and transformed into fried rice the next day. Because the electric pressure cooker delivers consistent textures, you can plan rice recipe ideas around predictable results rather than guessing how each pot will turn out.
For a simple side dish, cook one or two cups of rice with part water and part broth, then finish with herbs, citrus zest, or toasted nuts. Families who enjoy both white and brown rice can pressure cook separate batches in advance, then mix them after cooking to balance the nutty flavor of brown rice with the softness of white grains. When you understand how pressure cook settings, rice-to-water ratios, and minutes under pressure interact, you can confidently scale up quantities for gatherings without sacrificing quality.
Batch cooking also supports healthier eating habits. Prepare several cups of rice in your Instant Pot or other electric pressure cooker at the start of the week, then portion the rice into containers for quick lunches and dinners. With a reliable method for pressure cooking rice, you always have a ready base for bowls, salads, and warm side dish options that feel intentional rather than improvised.
Safety, maintenance, and getting the best from your electric pressure cooker
Safe cooking of white rice in a pressure cooker begins with respecting pressure and steam. Always check that the sealing ring, lid, and pressure release valve on your electric pressure cooker are clean and correctly positioned before you cook. Never force the lid open while the cooker is still under pressure, and use the handle or a utensil to operate the release rather than your bare hand.
Regular maintenance protects both your appliance and the quality of your rice. Wash the inner pot thoroughly after each batch, paying attention to any starch residue from cooking water that might cling to the surface and cause sticking later. Inspect the sealing ring periodically, because a worn ring can prevent proper pressure build up and lead to inconsistent cooking times or incomplete pressure release.
To extend the life of your Instant Pot or other electric pressure cooker, avoid scratching the inner pot with metal utensils and store the lid upside down to keep odors from concentrating. When you treat the cooker carefully, it rewards you with years of reliable rice performance, from quick weeknight batches to more elaborate grain-based dishes. Over time, you will refine your preferred ratios, cooking times, and release methods until every cup of rice you cook feels effortless and every side dish of white rice supports the rest of your meal with quiet confidence.
Key figures about pressure cooked rice and electric cookers
- Modern electric pressure cookers typically reduce white rice cooking time to about 3 to 5 minutes at high pressure, compared with 15 to 20 minutes simmering on a stovetop, which represents roughly a threefold time savings according to typical manufacturer guidelines and user manuals.
- Most Instant Pot style cookers operate at around 70 to 80 kilopascals of pressure above atmospheric level on high settings, which raises the boiling point of water to approximately 115 to 118 °C and speeds rice hydration significantly; these values reflect common specifications reported by major pressure cooker brands.
- Standard inner pots in household electric pressure cookers usually hold between 3 and 6 litres, allowing home cooks to prepare from 1 to about 8 cups of rice in a single batch while maintaining safe headspace for steam and foam, as recommended in many appliance instruction booklets.
- Food safety agencies in several countries advise keeping cooked rice below about 5 °C in the refrigerator and using it within 1 to 3 days, because Bacillus cereus spores can survive cooking and multiply quickly at room temperature if rice is left out too long.
- Independent energy efficiency tests on electric pressure cookers report reductions of up to about 50 % in electricity use compared with traditional electric stovetop boiling for similar quantities of rice and grains, especially when natural pressure release is used instead of extended simmering; actual savings vary by model and household energy costs.
FAQ about cooking white rice in a pressure cooker
How much water should I use for one cup of white rice in a pressure cooker ?
A reliable starting point is one cup of rice to one cup of water for long grain white rice in an electric pressure cooker. If you prefer softer textures, increase the water slightly, while firmer rice needs a little less liquid. Always rinse the rice first and adjust the ratio gradually over several batches until the cooked rice matches your taste.
How long does it take to cook white rice under pressure ?
Most electric pressure cookers and Instant Pot models cook long grain white rice in about 3 to 5 minutes at high pressure. After that, allow 10 minutes of natural pressure release so the grains finish steaming gently. The total time, including heat up and release, is usually around 20 to 25 minutes from start to finish.
Can I cook brown rice and white rice together in a pressure cooker ?
Brown rice and white rice have different cooking times, so cooking them together in one pot is challenging. Brown rice usually needs more water and a longer time under pressure than white rice, which can leave the white grains overcooked. For best results, cook them separately in your electric pressure cooker, then mix them after cooking if you want a combined side dish.
Why is my pressure cooked rice mushy or sticky ?
Mushy or sticky rice usually comes from too much water, too long under pressure, or insufficient rinsing. Reduce the rice-to-water ratio slightly, shorten the minutes at high pressure, and always rinse the rice until the water runs almost clear before cooking. Avoid stirring the rice before it cooks, because broken grains release more starch and encourage clumping.
Is it safe to leave cooked rice in the pressure cooker on warm ?
Most electric pressure cookers have a keep warm function that holds rice at a safe temperature for a few hours. For best quality and food safety, transfer leftover rice to shallow containers, cool it quickly, and refrigerate within two hours. Reheat thoroughly before serving, and discard any rice that has been left at room temperature for longer than recommended by food safety guidelines.