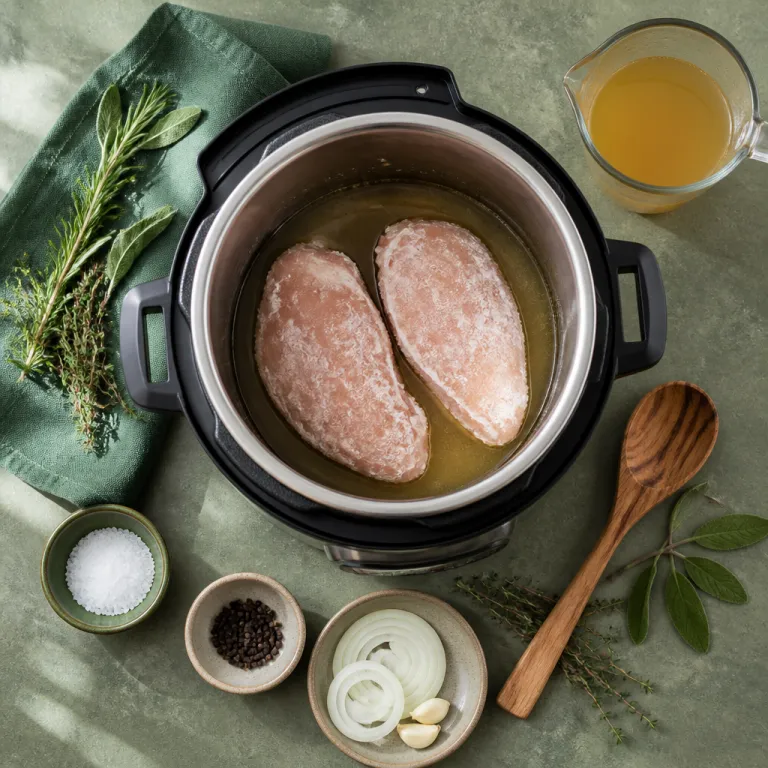
Why cooking frozen chicken in a pressure cooker works for busy home cooks
Cooking frozen chicken in a pressure cooker gives you safe, fast dinners with very little planning. When you use high pressure correctly, the cooking time becomes predictable and the meat stays juicy instead of stringy. This approach turns a solid block of frozen chicken into tender cooked pieces without last minute panic or risky shortcuts.
Many people worry that frozen chicken breasts or chicken thighs will stay raw in the center. In an electric pressure cooker or Instant Pot style appliance, the sealed pot and controlled pressure cook cycle solve that problem reliably. The cooker brings the internal temperature of each chicken breast or thigh above the food safety threshold and holds it there for several minutes, as recommended by national food safety agencies such as the USDA and equivalent authorities.
Think of the pressure cooker as a tightly controlled steam oven built into a pot. You add at least one cup of water or another thin cooking liquid, then lock the lid and set the cook time in minutes. As the Instant Pot or similar cooker reaches high pressure, superheated steam surrounds the frozen chicken and cooks it evenly from edge to core, reducing the risk of cold spots.
For most boneless chicken breasts, a practical guideline is to cook frozen pieces at high pressure for around 10 to 12 minutes per 500 grams of total chicken. Thicker chicken breast fillets or large chicken thighs may need a few extra minutes of pressure cook time. Always confirm doneness with a thermometer, aiming for at least 74–75 °C (165 °F) in the thickest part of the breast or thigh, the minimum internal temperature widely cited by food safety agencies such as the USDA Food Safety and Inspection Service.
Because the pot is sealed, flavors stay concentrated and chicken recipes taste richer. Simple seasonings like salt, pepper, garlic, and herbs infuse the meat while the breasts cook quickly under pressure. You will also capture a flavorful cooking liquid in the pot that works beautifully for quick sauces, soups, or future meal prep, so very little flavor is wasted.
Electric pressure cookers shine when your schedule is tight and the chicken is still frozen. Instead of waiting hours for a slow thaw, you can cook frozen poultry safely in under 40 minutes including time to reach pressure and pressure release. This combination of speed, safety, and consistent texture explains why cooking frozen chicken in pressure cooker appliances has become a weeknight staple for many home cooks.
Essential safety rules for cooking frozen chicken in pressure cooker appliances
Food safety must guide every decision when cooking frozen chicken in pressure cooker devices. The goal is to move the chicken from the frozen zone through the bacterial danger zone quickly, then hold it at a safe temperature long enough. Your electric cooker, when used correctly, is designed to manage this process more reliably than stovetop boiling or pan frying from frozen.
Always start by checking that your pressure cooker sealing ring, lid, and pressure release valve are clean and correctly assembled. A damaged ring or blocked pressure release can prevent the pot from reaching stable high pressure, which affects both cook time and safety. If the cooker never reaches full pressure, the chicken breasts or chicken thighs may remain undercooked near the center even if the timer finishes.
Next, measure the liquid carefully because the cooker needs steam to build pressure. For most models, you should add at least one cup of water or thin stock to the pot before adding frozen chicken, following the minimum liquid guidance in your manufacturer’s manual. Thicker sauces can be stirred in after the pressure cook phase, because heavy liquids slow down heat transfer and may cause scorching on the bottom of the pot or trigger burn warnings.
Arrange the frozen chicken breasts or pieces in a single layer when possible. If you must stack frozen chicken, separate the layers with a trivet or rack to allow hot steam to circulate around each breast or thigh. This simple step helps every piece cook evenly within the programmed minutes and reduces the risk of partially cooked chicken in the middle of a frozen clump.
Use the manual or pressure cook setting on your Instant Pot or similar cooker, and always choose high pressure for frozen poultry. Low pressure does not move heat through dense frozen meat quickly enough, which can extend cook time and compromise texture. When the cycle ends, allow at least a brief natural pressure release so the internal temperature stays high while the cooker gradually depressurizes.
For sautéing aromatics before adding frozen chicken, a dedicated sauté pan that fits your electric pressure cooker can elevate everyday cooking. A guide on how a sauté pan elevates everyday cooking on your electric pressure cooker explains why browning onions, garlic, or spices first deepens flavor without affecting safety. Once the aromatics are ready, you add the cup of water or stock, nestle in the frozen chicken, and proceed with the pressure cook cycle as usual.
Never attempt to pressure cook whole frozen chickens because the dense mass prevents even heating. Stick to smaller cuts such as chicken breast halves, chicken thighs, or drumsticks, which allow the heat and steam to penetrate quickly. After cooking, always verify that juices run clear and that the thickest part of each piece reaches at least 74–75 °C (165 °F) before serving, in line with guidance from national food safety organizations.
Setting precise cook times for frozen chicken breasts and thighs
Getting the cook time right is the key to tender results when cooking frozen chicken in pressure cooker appliances. Too few minutes under high pressure leaves the center undercooked, while too many minutes can dry out lean chicken breasts. A structured approach to timing helps you repeat good results and avoid guesswork from one batch to the next.
For average boneless frozen chicken breasts weighing about 180 to 220 grams each, a reliable starting point is 10 to 12 minutes at high pressure for a single layer. If the breasts are very thick or you are cooking several layers, increase the cook time to 13 to 15 minutes for the same total weight. Always factor in that the Instant Pot or similar cooker needs additional minutes to reach pressure before the timer starts, especially with very cold ingredients.
Bone-in chicken thighs handle longer cooking better because their higher fat content protects against dryness. When you cook frozen chicken thighs, set the pressure cook cycle for 13 to 15 minutes at high pressure for medium pieces. Larger or very meaty thighs may benefit from 16 to 18 minutes, especially if they start as a solid frozen block that slows heat penetration.
Some cooks prefer to use a slightly shorter cook time followed by a longer natural pressure release. This method allows the chicken to finish cooking gently as the pressure drops, which can improve texture and juiciness. It also gives you more flexibility if you plan to turn the meat into shredded chicken for tacos, salads, or soups, where a very soft texture is welcome.
When adapting traditional chicken recipes for the pressure cooker, reduce the stovetop simmer time by roughly two thirds. For example, a recipe that simmers chicken breast for 30 minutes on the stove often needs only about 10 minutes at high pressure. Always test the adapted recipe once, then adjust the cook time by one or two minutes in future batches to match your preferred texture and your specific appliance.
If you are interested in how different slow cooking methods compare, a guide on how to make tender chuck roast in a crock pot like a pro offers useful context. While that article focuses on beef, it highlights how connective tissue responds to long, moist cooking, which also applies to bone-in chicken thighs. Understanding these principles helps you decide when to use a long slow cooker method and when the Instant Pot or another pressure cooker is the better choice for frozen poultry.
Keep a small notebook or digital log of your pressure cook experiments with frozen chicken. Record the weight of the chicken breasts or thighs, the amount of water or stock, the cook time, and the type of pressure release used. Over a few weeks, you will build a personal reference of chicken recipes and timings that work perfectly with your specific cooker model and your family’s taste.
| Cut & thickness (frozen) | Weight range | Pressure level | Suggested cook time* | Release method |
|---|---|---|---|---|
| Boneless chicken breasts, single layer | 500–900 g total | High pressure | 10–12 minutes | 5–10 min natural, then quick |
| Boneless chicken breasts, thick or stacked | 500–900 g total | High pressure | 13–15 minutes | 5–10 min natural, then quick |
| Bone-in chicken thighs, medium | 600–1,000 g total | High pressure | 13–15 minutes | 10–15 min natural |
| Bone-in chicken thighs, very meaty or in a block | 600–1,000 g total | High pressure | 16–18 minutes | 10–15 min natural |
| Mixed pieces (breasts & thighs) | 700–1,200 g total | High pressure | 13–15 minutes | 10 min natural, then quick |
*Times are general starting points for electric pressure cookers at typical household pressure settings. Always confirm that the internal temperature reaches at least 74–75 °C (165 °F).
Natural pressure release versus quick release for frozen chicken
The way you handle pressure release after cooking frozen chicken in pressure cooker appliances has a major impact on texture. Natural pressure release means letting the cooker sit until the pressure drops on its own, while quick release means opening the valve to vent steam immediately. Each method has strengths, and the best choice depends on the cut of chicken and your schedule.
For lean chicken breasts, a short natural pressure release of about 5 to 10 minutes often gives the best balance. The chicken continues cooking gently in the hot environment, which helps the center reach a safe temperature without overcooking the outer layers. After those minutes pass, you can switch to a controlled quick pressure release to stop the cooking process and prevent dryness.
Bone-in chicken thighs and drumsticks usually benefit from a longer natural pressure release. Allowing the cooker to sit for 10 to 15 minutes before opening the valve lets connective tissue relax and moisture redistribute. This approach is especially helpful when you plan to serve the cooked chicken pieces whole rather than turning them into shredded chicken for tacos or casseroles.
Quick release has its place when you need to protect delicate ingredients or prevent overcooking vegetables in mixed recipes. If you are pressure cooking frozen chicken together with potatoes or green beans, you might choose a slightly shorter cook time followed by an immediate quick release. In that scenario, the vegetables stay firm while the chicken remains safely cooked and moist.
Always keep your hands and face away from the steam path during any pressure release. Use a long handled utensil or a heat resistant glove to move the valve, because the jet of steam can cause burns. Once the float valve drops, you can safely open the pot and check the chicken with a thermometer to confirm that the breast or thigh has reached at least 74–75 °C (165 °F).
Some home cooks like to use a hybrid method for cooking frozen chicken in pressure cooker appliances. They set a slightly longer cook time, then perform a partial natural pressure release before finishing with a quick release. This technique can be especially effective for Instant Pot chicken recipes that will be used for meal prep, because it yields consistently tender cooked chicken that reheats well.
Remember that every pressure cooker model behaves a little differently, and altitude also affects pressure release behavior. If you live at high elevation, you may need to extend both cook time and natural pressure release by a few minutes, as many manufacturer manuals note. Keep notes on how your specific pot responds so you can fine tune the balance between safety, tenderness, and convenience.
Building flavorful one pot chicken meals from frozen in your electric cooker
Once you understand timing and pressure release, you can turn cooking frozen chicken in pressure cooker appliances into complete one pot meals. The sealed environment of the pot concentrates flavors, so even simple ingredients taste rich and satisfying. With a little planning, you will have chicken recipes that go from freezer to table with minimal effort and cleanup.
Start by layering flavors in the pot before adding frozen chicken breasts or thighs. Use the sauté function to cook onions, garlic, and spices in a small amount of oil until fragrant, then add a cup of water, stock, or thin tomato sauce. Nestle the frozen chicken into this base, making sure there is enough liquid to reach pressure without submerging the meat completely.
For a basic Instant Pot chicken breast recipe, combine 700 to 900 grams of frozen chicken breasts with 1 to 1.5 cups of stock, dried herbs, and a splash of lemon juice. Cook at high pressure for 10 to 12 minutes for a single layer, then allow a brief natural pressure release of 5 to 10 minutes. The resulting cooked chicken breast will be tender enough to slice for salads, grain bowls, or sandwiches, and the cooking liquid becomes a light sauce or broth.
If you prefer darker meat, frozen chicken thighs work beautifully with bolder seasonings. Try a mixture of smoked paprika, cumin, and garlic powder, then pressure cook the thighs over a bed of onions and peppers. After cooking, you can shred the chicken for tacos or serve the pieces whole with the vegetables and some of the reduced pot juices.
One pot chicken and rice dishes require a slightly different strategy because rice is sensitive to overcooking. In many cases, it is better to pressure cook the frozen chicken first with enough water or stock, then remove the cooked chicken and use the hot liquid to cook the rice on the sauté or low pressure setting. This two step approach prevents mushy grains while still keeping everything in a single pot for convenience.
For busy evenings, curated collections of five one pot pressure cooker dinners you can prep in under ten minutes offer valuable inspiration. These types of guides show how to combine frozen chicken, pantry staples, and vegetables into balanced meals with minimal chopping. By following tested ratios of liquid, cook time, and pressure release, you reduce the risk of undercooked or dry meat.
As you build your own chicken recipes, think about how the cooked chicken will be used later in the week. Neutral seasonings on the initial batch allow you to transform leftovers into multiple dishes, from pasta to soups. This strategy turns a single pressure cook session into efficient meal prep that supports varied dinners without repetitive flavors.
Turning pressure cooked frozen chicken into versatile meal prep staples
Cooking frozen chicken in pressure cooker appliances is not only about tonight’s dinner, it is also a powerful tool for meal prep. A single batch of pressure cooked chicken breasts or thighs can anchor several recipes across the week. This approach saves time, reduces food waste, and keeps protein ready for quick assembly meals.
Begin by pressure cooking a larger quantity of frozen chicken than you need for one meal. Use your Instant Pot or similar cooker to prepare a mix of chicken breasts and chicken thighs, adjusting the cook time so every piece reaches a safe temperature. After a short natural pressure release, remove the cooked chicken and let it cool slightly before handling.
Decide whether you want sliced, cubed, or shredded chicken for your planned recipes. For shredded chicken, use two forks to pull the meat apart while it is still warm, because the fibers separate more easily. You can then toss the shredded chicken with a small amount of the cooking liquid from the pot to keep it moist during storage.
Portion the cooked chicken into airtight containers, ideally in 150 to 200 gram servings for individual meals. Label each container with the type of chicken, such as breast or thigh, and the date of cooking. Store the portions in the refrigerator for up to three days or freeze them for longer term meal prep, following general cold storage guidance from food safety agencies.
During the week, these prepared portions become the foundation for fast chicken recipes. Add sliced chicken breast to salads or grain bowls, stir cubed chicken into soups, or use shredded chicken for wraps and tacos. Because the meat was cooked gently under high pressure, it reheats without becoming tough or stringy when handled properly.
When reheating, add a splash of water or stock to prevent dryness, especially for lean chicken breasts. You can warm the portions in a small covered pan, in the microwave, or briefly in the pressure cooker on the sauté setting. Avoid long reheating times, because the goal is to bring the cooked chicken to serving temperature, not to cook it again.
This meal prep strategy works equally well whether you prefer plain seasoned chicken or more complex flavors. If you want maximum flexibility, keep the initial pressure cooked chicken lightly seasoned with salt, pepper, and a few herbs. Later, you can add sauces or spices tailored to each recipe, turning a neutral base into Italian, Mexican, or Asian inspired dishes without extra pressure cook cycles.
Key settings and troubleshooting tips for reliable results every time
Reliable results with cooking frozen chicken in pressure cooker appliances depend on understanding your machine’s settings. Most modern electric cookers, including the popular Instant Pot models, offer presets, but manual control gives you the most consistent outcomes. Learning how to adjust pressure level, cook time, and pressure release method turns guesswork into a repeatable process.
Always choose the manual or pressure cook function rather than relying on generic poultry presets. Set the cooker to high pressure for frozen chicken, because low pressure does not move heat through the meat quickly enough. Then select a cook time based on the weight and thickness of the chicken breasts or thighs, using your personal log and the reference table above as a guide.
If your cooked chicken emerges underdone, resist the urge to panic. Return the pieces to the pot, add a small splash of water or stock if the bottom looks dry, and pressure cook for an additional 2 to 3 minutes at high pressure. After a brief natural pressure release, check the internal temperature again until every breast and thigh reaches at least 74–75 °C (165 °F).
Dry or stringy chicken usually indicates too much cook time or an overly aggressive quick release. To correct this, reduce the initial minutes by one or two and allow a longer natural pressure release on your next batch. You can also leave a small amount of cooking liquid clinging to the chicken when storing it, which helps protect texture during reheating.
Burn warnings on the cooker display often result from thick sauces or insufficient liquid. Always ensure there is at least one cup of water or thin liquid in the pot before starting the pressure cook cycle, especially when cooking frozen chicken. If you want a rich sauce, add creamy or thick ingredients after pressure cooking, using the sauté function to finish the recipe and reduce the liquid.
Unevenly cooked chicken, where some breasts are perfect while others remain slightly pink, usually comes from stacking or uneven sizes. Try to choose pieces of similar thickness and arrange them in a single layer when possible, using a trivet to separate layers if necessary. If a few pieces lag behind, you can return only those to the pot for a short additional cook time without overcooking the rest.
Over several uses, you will learn how your specific pressure cooker behaves with different loads and liquids. Treat each batch of frozen chicken as data for refining your personal chicken recipes, noting how changes in liquid volume, pressure release, or cook time affect the final texture. With this methodical approach, cooking frozen chicken in pressure cooker appliances becomes a precise, dependable technique rather than a gamble.
Key figures and safety statistics for pressure cooked frozen chicken
- Food safety agencies recommend cooking all poultry, including chicken breasts and chicken thighs, to an internal temperature of at least 74–75 °C (165 °F) to kill harmful bacteria such as Salmonella and Campylobacter (guidelines from national food safety authorities like the USDA Food Safety and Inspection Service and comparable organizations).
- Studies on pressure cooking show that reaching high pressure can raise water temperature to about 115 to 120 °C, which shortens the time needed to achieve safe internal temperatures compared with conventional boiling at 100 °C in an open pot.
- Electric pressure cookers typically require 5 to 15 minutes to reach full pressure, depending on the volume of food and liquid, which must be added to the programmed cook time when planning total meal duration from freezer to table.
- Guidance from food safety organizations indicates that cooked chicken stored in a refrigerator at or below 4 °C should be consumed within 3 to 4 days, while frozen cooked chicken can maintain quality for 2 to 6 months when properly wrapped and kept at a consistent freezer temperature.
- Consumer surveys on home cooking habits report that a significant share of users rely on frozen chicken for weeknight meals, which underscores the importance of clear instructions for cooking frozen chicken in pressure cooker appliances and using a thermometer to verify doneness.
FAQ about cooking frozen chicken in a pressure cooker
Can I safely cook frozen chicken in a pressure cooker without thawing?
Yes, you can safely cook frozen chicken in a pressure cooker as long as you use enough liquid, choose high pressure, and cook until the internal temperature reaches at least 74–75 °C (165 °F). The sealed pot and elevated temperature help move the meat quickly through the bacterial danger zone. Always verify doneness with a food thermometer inserted into the thickest part of the breast or thigh.
How much water should I add when pressure cooking frozen chicken?
Most electric pressure cookers need at least one cup of water or another thin liquid to reach and maintain pressure. For larger batches of frozen chicken, you may use up to 1.5 cups, especially if some liquid will be absorbed by rice or vegetables. Avoid very thick sauces during the pressure cook phase, and add them after cooking using the sauté function.
What is the typical cook time for frozen chicken breasts in an electric pressure cooker?
Average boneless frozen chicken breasts weighing around 180 to 220 grams usually need 10 to 12 minutes at high pressure for a single layer, plus time for the cooker to reach pressure. Very thick or stacked pieces may require 13 to 15 minutes to reach a safe internal temperature. Always adjust by one or two minutes in future batches based on your preferred texture and your specific cooker model.
Should I use natural pressure release or quick release for frozen chicken?
A short natural pressure release of 5 to 10 minutes works well for lean chicken breasts because it finishes the cooking gently and helps retain moisture. Bone-in chicken thighs often benefit from a longer natural release of 10 to 15 minutes to allow connective tissue to relax. You can then use a controlled quick release to stop cooking once the desired time has passed.
Can I cook rice or vegetables with frozen chicken in the same pot?
Yes, you can cook rice or vegetables with frozen chicken in the same pot, but you must balance their different cooking needs. Firm vegetables like carrots and potatoes tolerate the full pressure cook time, while delicate vegetables are better added after pressure cooking and simmered briefly. For rice, many cooks prefer to pressure cook the chicken first, then use the hot cooking liquid to cook the rice separately in the pot to avoid overcooked grains.