How dual pressure settings actually change what happens in the pot
Most home cooks hear about a pressure cooker high vs low pressure setting and assume it is a minor tweak. Inside the sealed pot, though, a small change in cooker pressure shifts the temperature cooking environment enough to turn tender eggs into rubber or keep beans stubbornly hard. Understanding how pressure builds and how that pressure will raise the boiling point of water is the difference between reliable weeknight cooking and frustrating guesswork.
At high pressure, most electric pressure cookers operate around 0,7 to 0,8 bar psi above atmospheric pressure, which translates to roughly 70 to 80 kilopascals over normal kitchen conditions. That extra cooker pressure pushes the boiling point of water from about 100 °C to close to 121 °C, so the steam and liquid inside the pot cook food faster and drive heat deeper into tough fibers. Low pressure settings usually sit closer to 0,35 to 0,5 bar psi, which means the point water reaches a boil is nearer 110 to 115 °C and gives you a gentler style of pressure cooking.
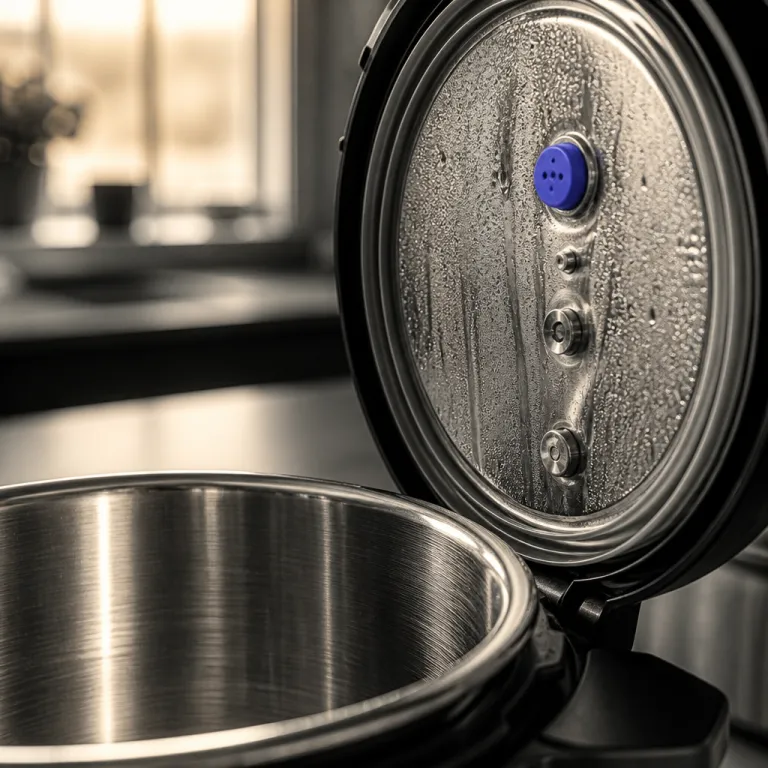
When pressure builds in an electric pressure cooker, the lid will lock and the valve closes, trapping steam and raising temperature in a controlled way. That sealed lid and the trapped liquid mean your food is surrounded by moist high heat, so braises that once took three hours on an electric stovetop can be pressure cooked in under one hour. With low pressure, the cooker will still shorten cooking time dramatically, but the lower temperature cooking environment protects delicate food from overcooking while still using the same basic pressure cooking physics.
High pressure vs low pressure in electric vs stovetop models
Electric pressure cookers and classic stovetop pressure cookers both rely on the same steam and water physics, yet they handle a pressure cooker high vs low pressure setting very differently. A modern electric pressure cooker uses sensors to monitor temperature and cooker pressure, then adjusts power so pressure will stay within a narrow band for the entire cooking time. Stovetop pressure models depend on the cook to manage high heat on an electric stovetop or gas burner, listening for the valve and watching how fast steam escapes.
Most mainstream electric pressure cookers, like the Instant Pot Duo or Ninja Foodi, offer a default high pressure mode and sometimes a separate low pressure option hidden under custom settings. Premium models such as the Breville Fast Slow Pro go further, letting you dial in more precise electric pressure levels and automatically handle the release pressure phase at the end. That kind of control matters when you are switching between recipes for beans at high pressure and recipes for custards at low pressure, because the cooker will behave differently as pressure builds and then drops.
Traditional stovetop pressure cookers usually have a single high pressure setting around 0,8 bar psi, with some models offering a second lower ring or weight for gentler pressure cooking. On these cookers, the lid will only lock once enough steam has built up, and the valve starts to jiggle or hiss when cooker pressure climbs too high. If you want sous vide style precision for temperature cooking, you still need a separate immersion circulator, but understanding how these pressure levels work will make it easier to follow any guide to immersion cooker mastery for precise sous vide cooking at home alongside your pressure cooking routine.
Foods that demand high pressure for best texture and flavor
When you compare a pressure cooker high vs low pressure setting, the clearest wins for high pressure show up with tough cuts of meat, dried beans, and whole grains. High pressure means higher temperature cooking, so collagen in beef chuck or pork shoulder melts into gelatin quickly while the surrounding liquid turns into a rich sauce. The same high heat and elevated boiling point of water help break down the dense structure of chickpeas, black beans, and wheat berries in a fraction of the usual time.
For example, a 1,5 kilogram beef chuck roast that might need three hours in a slow cooker can be pressure cooked at high pressure in about 60 to 70 minutes, plus a natural release pressure phase to keep the meat juicy. Dried beans that usually simmer for two hours on the stovetop often soften in 25 to 35 minutes under high pressure, provided you use enough water and avoid adding acidic liquid too early. Whole grains like farro or brown rice also benefit from this higher temperature, because the steam and liquid penetrate the bran layer more efficiently than simple boiling.
Chicken thighs and drumsticks sit in an in between zone where both high and low pressure cooking work, but high pressure usually gives better results for busy cooks. If you follow an optimal cooking time for chicken in an electric pressure cooker guide, you will see that dark meat handles the intense steam and heat without drying out. In these recipes, the cooker will build pressure quickly, the lid will stay locked until the valve drops, and the pressure will keep the pot at a stable high temperature while the food cooks evenly.
When low pressure quietly saves eggs, fish, and vegetables
Low pressure is where a pressure cooker high vs low pressure setting stops being a technical detail and starts protecting delicate food from abuse. At low pressure, the boiling point of water rises only slightly, so the temperature cooking environment inside the pot stays closer to a gentle poach than a rolling boil. That difference matters for eggs, flaky fish, custards, and tender vegetables, which all turn grainy or mushy when exposed to aggressive steam and high heat.
Soft or hard cooked eggs are the classic example, because high pressure often leads to rubbery whites and green tinged yolks, while low pressure keeps the texture creamy. Steaming eggs on a rack with just enough water in the pot to build pressure lets the cooker will handle the timing precisely, and a quick release pressure at the end stops the cooking instantly. The same approach works for salmon fillets or cod, where low pressure and a short cooking time keep the flakes intact instead of shredding into dry strands.
Delicate vegetables like asparagus, green beans, and broccoli also benefit from low pressure cooking, especially when you want bright color and a slight bite. Using a small amount of liquid under a steamer basket, you let pressure builds just enough to surround the food with gentle steam without turning it to mush. Custards and cheesecakes rely on this lower cooker pressure too, because the lid will trap moist heat while the valve prevents harsh bubbling that can crack the surface or curdle the mixture.
The in between zone: chicken, rice, lentils, and mixed meals
Some foods sit right in the middle of the pressure cooker high vs low pressure setting debate, because they tolerate both but respond differently. Chicken breast, white rice, and lentils all cook quickly, so the choice between high pressure and low pressure becomes more about texture and timing than raw power. If you are juggling work, family, and dinner, understanding how pressure will change these ingredients helps you pick the right setting without overthinking every recipe.
Chicken breast tends to dry out at high pressure unless you shorten the cooking time and use enough liquid to generate steam without boiling the meat to death. Low pressure gives you a slightly wider safety margin, especially if the pot includes vegetables or grains that need a gentler temperature cooking profile. Lentils behave differently depending on the variety, with brown and green holding shape better at low pressure and red lentils turning into a smooth soup or dal more quickly at high pressure.
Rice is forgiving but still sensitive to cooker pressure, because the ratio of water to grain and the total time under steam both matter. At high pressure, white rice often finishes in just a few minutes, while low pressure adds a couple of minutes but can reduce sticking on the bottom of the pot. For mixed meals like one pot chicken and rice or layered recipes such as weeknight chicken tacos in the pressure cooker, the cooker will usually rely on high pressure to keep total cooking time short, but you can sometimes switch to low pressure to protect quick cooking vegetables on top.
Budget vs premium cookers: what dual pressure really buys you
When you shop for pressure cookers, the difference between a basic model and a premium one often comes down to how they handle a pressure cooker high vs low pressure setting. Many entry level electric pressure cookers lock you into a single high pressure mode, which is fine for beans, stews, and tough cuts but limits your options for eggs, fish, and desserts. Dual pressure models add a low pressure option that turns the same pot into a more versatile cooking tool without adding much complexity to your routine.
On budget cookers, the manufacturer usually hides the low pressure choice behind a manual or custom button, so you need to read the manual once and then remember which program controls cooker pressure. Premium machines like the Breville Fast Slow Pro or higher end Instant Pot models make this clearer, showing high pressure and low pressure directly on the display and sometimes even listing approximate bar psi values. That transparency builds trust, because you can see how pressure builds, how the valve behaves, and how the cooker will manage the release pressure phase after your recipes finish.
If you mostly cook beans, braises, and big batches of soup, a single pressure setting may cover nearly all your pressure cooking needs. However, if you care about precise temperature cooking for eggs, vegetables, and custards, dual pressure becomes less of a luxury and more of a requirement. In practice, the lid will lock the same way on both settings, the steam and liquid still do the work, but the lower cooker pressure gives you a margin of error that busy home cooks appreciate on hectic weeknights.
Quick reference: matching foods, pressure levels, and timing
Choosing between a pressure cooker high vs low pressure setting gets easier when you match food types to clear rules. High pressure works best for anything tough, dense, or dry, while low pressure suits delicate, quick cooking ingredients that you would normally simmer or steam gently. Thinking in these categories helps you predict how pressure will affect texture, so you can adjust both the setting and the cooking time with confidence.
Use high pressure for dried beans, chickpeas, whole grains, beef chuck, pork shoulder, lamb shanks, and bone broth, because these foods need a higher boiling point of water to break down connective tissue. Plan on roughly half to one third of the usual stovetop time, always with enough water or other liquid to keep the pot from running dry while steam circulates. For these recipes, let pressure builds fully before you start timing, then allow a natural release pressure so the temperature drops slowly and the food relaxes in the hot liquid.
Choose low pressure for eggs, fish fillets, shrimp, custards, cheesecakes, asparagus, broccoli, and green beans, where a gentler cooker pressure protects structure and color. Expect to use slightly longer times than you would at high pressure, but still far less than traditional slow cooking or open pot simmering. In every case, remember that the lid will stay locked until the valve drops, the cooker will only open once the pressure cooked environment returns to normal, and your job is simply to match the right setting to the right food so dinner fits your schedule instead of the other way around.
Key figures on pressure, temperature, and cooking performance
- Most electric pressure cookers run at about 0,7 to 0,8 bar psi above atmospheric pressure on their high pressure setting, which raises the internal boiling point of water to roughly 121 °C according to manufacturer specifications.
- Low pressure modes on consumer pressure cookers typically operate around 0,35 to 0,5 bar psi, keeping the boiling point of water closer to 110 to 115 °C, based on data published by major brands such as Instant Brands and Breville.
- At 121 °C under high pressure, many bacteria and spores are inactivated in 15 to 20 minutes, which is why similar temperatures are used in commercial sterilization processes documented by food safety agencies.
- Tests by independent cooking labs show that dried beans cooked at high pressure finish in roughly 25 to 35 minutes, compared with 90 to 120 minutes at normal boiling temperatures, representing a time reduction of more than 60 percent.
- Energy use studies on electric pressure cookers indicate that pressure cooking can reduce electricity consumption by around 50 to 70 percent compared with equivalent oven braising, because the sealed pot and shorter cooking time limit heat loss.
FAQ: high vs low pressure settings in everyday cooking
When should I use high pressure instead of low pressure
Use high pressure for tough cuts of meat, dried beans, whole grains, and dense root vegetables, because they need higher temperature cooking to break down fibers efficiently. Low pressure is better for eggs, fish, custards, and delicate vegetables, where a gentler cooker pressure prevents overcooking and keeps textures tender. If you are unsure, start with high pressure for hearty stews and low pressure for anything you would normally steam or poach.
Does low pressure really make a difference for eggs and fish
Yes, low pressure makes a noticeable difference for eggs and fish, because the boiling point of water and the internal temperature stay lower than on a high pressure setting. This gentler environment reduces the risk of rubbery egg whites, chalky yolks, or dry flaky fish. Many experienced cooks rely on low pressure specifically for these foods, then use a quick release pressure to stop cooking at the exact texture they want.
Can I cook all my recipes on high pressure to save time
You can cook many recipes on high pressure, but not all foods respond well to that intensity. Delicate ingredients like broccoli, asparagus, and custards can overcook or split when exposed to high heat and aggressive steam. For best results, reserve high pressure for sturdy foods and use low pressure or shorter times when texture matters more than raw speed.
What happens if my cooker only has one pressure setting
If your pressure cooker offers only a single high pressure mode, you can still handle most soups, stews, beans, and braises effectively. To mimic low pressure behavior, reduce cooking time, add a bit more liquid, and use natural release pressure for meats while choosing quick release for vegetables and eggs. This approach narrows the gap between true dual pressure cookers and simpler models, even though you lack a dedicated low pressure button.
How do I know when the pressure is fully released and it is safe to open
On electric pressure cookers, a float pin or indicator drops once internal cooker pressure returns to normal, and only then will the lid unlock. When you use a quick release, steam vents through the valve until pressure falls, while a natural release lets pressure drop slowly as the pot cools. Always wait for the indicator to fall and follow the manual, because forcing the lid early is unsafe and can damage both the cooker and your food.