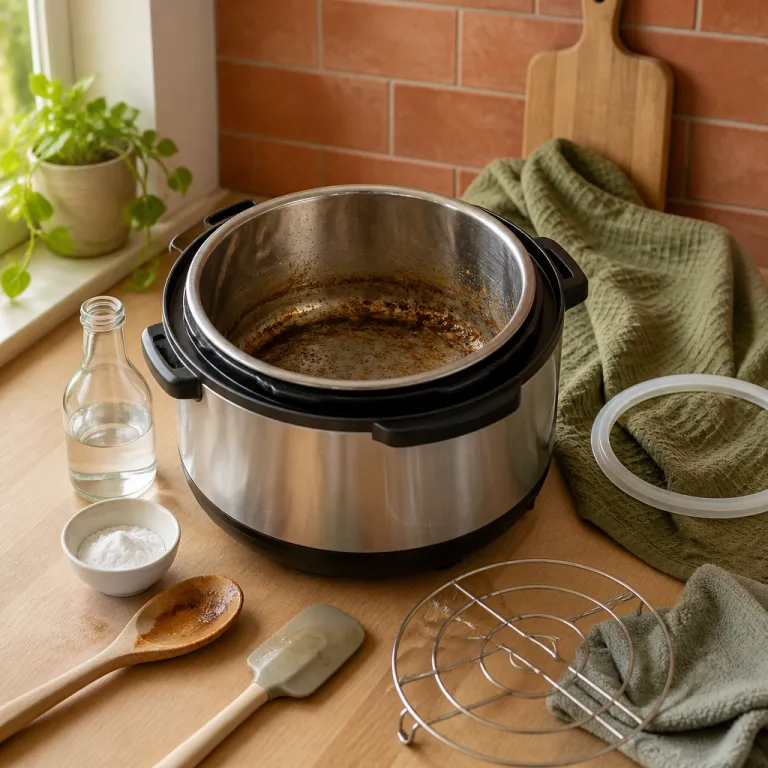
Section 1 – What a burn notice really means on an electric pressure cooker
When your electric pressure cooker flashes a burn notice, it is not failing. The sensor under the inner pot is detecting that the bottom surface is getting too hot for safe pressure cooking, usually because food is starting to burn against the metal. Treat that burn warning or burn message as a smoke alarm for your dinner, not as proof that the cooker is broken.
Every modern pressure cooker, from a basic 5.7 liter model to a larger 8 liter Instant Pot, uses an electric pressure control system that constantly reads temperature and liquid pressure at the bottom. When the bottom pot area climbs past a safe threshold before enough steam builds, the cooker will stop heating and throw a burn error or burn notice to protect both the food and the electronics. That is why you often see a burn error long before you smell any actual burn on the food itself.
Think of the inner pot as a thin metal sandwich between the heating plate and your ingredients. If there is not enough thin liquid like water or broth under the food, the heat has nowhere to go and the bottom starts to scorch while the top still looks barely cooked. The pressure cookers are doing their job by shutting down early, but the real pressure cooker burn notice fix starts with how you layer ingredients and how you manage liquid pressure inside the food pot.
Visual guide – basic layering diagram
Imagine a simple cross-section of the inner pot: a thin layer of water or stock at the very bottom, then meat, grains, or beans resting in that liquid, vegetables stacked above, and finally a cap of thick sauce or cream on top. That mental picture is the safest way to prevent a burn message before it starts.
Section 2 – The three main triggers and the simple layering pressure cooker burn notice fix
Most burn notices come from three predictable mistakes that first time users repeat. The first is starting pressure cooking with too little thin liquid in the pot, which means the cooker cannot generate enough steam to raise pressure before the bottom overheats. The second is putting thick sauce or dense ingredients directly on the bottom, where they behave like glue between the heater and the inner pot.
The third trigger is forgetting to cancel sauté mode, so the electric pressure element keeps running hot while the cooker tries to seal and build pressure. That extra residual heat pushes the bottom temperature past the burn warning threshold before the float valve can rise and lock in steam, so the cooker pressure system shuts down with a burn error or burn message. All three problems share one root cause, which is poor layering of ingredients and poor control of how liquid and steam move around the food.
The most reliable pressure cooker burn notice fix is a simple layering rule that works in both small and large pressure cookers. Always place at least 240 milliliters of thin liquid such as water, stock, or wine on the bottom, then add starches and proteins, and finally pour thick sauce on top without stirring it into the bottom pot layer. This keeps the bottom of the inner pot in direct contact with liquid, so steam can form quickly, liquid pressure can rise smoothly, and you avoid burn on the base even with tricky recipes like tomato based pasta or creamy rice dishes; if you later move to stackable accessories, this same logic applies when you use stackable pots in an electric pressure cooker for multi level cooking.
Suggested step photo – layering ingredients
Alt text: “Overhead photo of an electric pressure cooker inner pot showing a bottom layer of broth, a middle layer of pasta and chicken pieces, and a top layer of tomato sauce that has not been stirred in.”
Section 3 – Deglazing, sauté mode, and how to save a meal after a burn error
Many home cooks trigger their first burn notice right after using sauté mode for browning. When you sear meat or toast spices, tiny browned bits stick to the bottom of the inner pot and those dry spots heat faster than surrounding liquid during pressure cooking. The sensor reads that hot patch as a developing pot burn and the cooker responds with a burn warning or burn error even if the rest of the food is swimming in liquid.
The fix is a thirty second deglaze step that most manuals bury in small print but that matters more than any extra cooking program. After sautéing, pour in a small amount of water, stock, or other thin liquid, then scrape the bottom pot surface with a flat spatula until it feels completely smooth and you see no stuck ingredients. This simple move turns those browned bits into flavorful sauce instead of a hot spot that will trip the burn message halfway through pressure cooking.
When a burn notice appears mid cook, resist the urge to panic or throw away the whole pot of food. Use a quick release if your recipe allows, open the lid once the float valve drops, and inspect the bottom of the food pot for actual burn before deciding what to do. In many cases only a thin layer at the bottom has started to burn, so you can transfer the unburned food to a clean inner pot, add extra liquid, clean the sealing ring and lid, then restart pressure cooking with a shorter remaining time and still serve a perfectly acceptable dinner.
Model-specific example – Instant Pot Duo
On an Instant Pot Duo, the display will usually show “BURN” or “OvHt” while the unit stops heating. Press Cancel, perform a quick release if safe for your recipe, and follow the same scrape, add liquid, and restart routine described above; this mirrors the troubleshooting sequence outlined in the Instant Pot user manual for that series.
Suggested step photo – deglazing after sauté
Alt text: “Cook using a flat spatula to scrape browned bits from the bottom of an Instant Pot inner pot while a small amount of broth loosens the residue.”
Section 4 – Cleaning, maintenance, and how a dirty cooker creates more burn notices
Burn errors are not only about recipes and liquid levels, because maintenance also plays a quiet but important role. A warped or scratched inner pot transfers heat unevenly, so one side of the bottom may run hotter and trigger a burn warning even when you used enough water or thin sauce. Food residue baked onto the bottom pot surface from previous cooking sessions can behave like insulation, again pushing the sensor to read a burn message earlier than expected.
Regular cleaning is part of a long term pressure cooker burn notice fix, especially if you cook starchy foods like rice or pasta often. Always clean the inner pot with a non abrasive sponge, paying attention to the bottom where starch tends to stick and harden, and avoid metal utensils that can gouge the surface. Check the underside of the lid, the sealing ring, and the steam release parts after each use, because a clogged steam path or a damaged sealing ring can prevent proper pressure, which in turn keeps liquid from boiling evenly and increases the risk of pot burn on the base.
The float valve and steam release assembly also need occasional deep cleaning to keep electric pressure regulation accurate. If the float valve sticks, the cooker pressure system may misjudge when it has sealed, holding heat at the bottom longer while it waits for steam that never forms correctly. A few minutes spent keeping the cooker, lid, and food pot clean will pay off in fewer burn notices, more reliable recipes, and less time spent scrubbing a scorched bottom instead of enjoying your meal.
Suggested step photo – float valve and lid cleaning
Alt text: “Close-up of an electric pressure cooker lid with the sealing ring removed and the float valve and steam release parts exposed for cleaning.”
Section 5 – Model differences, recipe adjustments, and how to avoid burn across brands
Not every pressure cooker behaves like an Instant Pot, and that matters when you are chasing a stubborn burn notice. Some brands run hotter at the bottom, some have more sensitive sensors, and some use different algorithms for how quickly they ramp up electric pressure during the preheat phase. A recipe that never burns in one cooker may throw a burn error in another, especially if the second model has a thinner inner pot or a more aggressive sauté mode.
When you move between pressure cookers, treat online recipes as starting points rather than strict rules. If your new cooker tends to show a burn warning with tomato based recipes, increase the thin liquid by 60 to 120 milliliters, keep thick sauce on top of the other ingredients, and avoid stirring until after pressure cooking finishes. For very starchy dishes like one pot pasta, chili with beans, or rice casseroles, consider shortening the pressure cooking time slightly and letting the food finish with residual heat, which reduces the time that the bottom pot area sits at maximum temperature.
First time buyers often ask whether a more expensive cooker will automatically avoid burn notices. The honest answer is that even a premium Instant Pot model or other high end pressure cookers cannot override physics, because thick food on the bottom will still burn before water can generate enough steam. What you gain with better models is more precise control of cooker pressure, more reliable float valve behavior, and clearer burn message logic, but the core pressure cooker burn notice fix still depends on how you layer ingredients, how much liquid you add, and how carefully you clean and maintain the food pot and lid.
Section 6 – Practical step by step playbook: from burn notice to reliable weeknight cooking
Turning a frustrating burn notice into a rare event requires a repeatable routine. Start every recipe by checking that the inner pot is dry on the outside, that the sealing ring is seated evenly, and that the float valve and steam release are free of dried food. Then measure at least 240 milliliters of thin liquid such as water or broth into the pot, because that base layer is what will generate steam and liquid pressure safely.
Next, place dense ingredients like meat and grains into the liquid without packing them tightly against the bottom, then add vegetables and finally pour thick sauce or cream on top without stirring. If you use sauté mode first, always deglaze the bottom pot surface with a splash of liquid and scrape until it feels smooth before you switch to pressure cooking. Once the lid is on, set the cooker pressure level recommended by the recipe, confirm that the steam release is in the sealing position, and make sure the lid and handles place properly so the cooker can seal and avoid burn errors caused by slow pressurization.
If a burn warning or burn message still appears, cancel the program, release pressure according to the recipe, and inspect the bottom of the food pot calmly. Remove any burned layer, add more thin liquid, stir to redistribute ingredients, and restart with a shorter remaining time, knowing that most of the cooking is already done. Over a few weeks of practice, you will learn how your specific Instant Pot or other electric pressure cooker behaves, and that knowledge turns the pressure cooker burn notice fix from a mystery into a simple checklist you barely think about, whether you are making basic beans, complex one pot recipes, or even pressure cooked potatoes using guides such as mastering how to pressure cook potatoes for perfect results every time.
Quick troubleshooting checklist
- Pause and release pressure safely, then open the lid once the float valve drops.
- Check the bottom of the inner pot for stuck or scorched food and remove any burned layer.
- Add 120 to 240 milliliters of extra thin liquid and stir to loosen dense or starchy ingredients.
- Scrape the base until it feels smooth, then clean the lid, sealing ring, and steam release if needed.
- Rebuild layers with liquid on the bottom, dense foods in the middle, and thick sauce on top.
- Restart on pressure cook with a shorter remaining time and allow a few minutes of natural release.
Key figures about burn notices and electric pressure cooking
- Consumer feedback collected by major retailers and appliance brands consistently shows that burn errors and burn notices are among the most common frustrations with electric pressure cookers, which means a simple pressure cooker burn notice fix can directly increase how often the appliance earns its counter space.
- Most electric pressure cooker manuals specify a minimum of about 240 milliliters of thin liquid for safe pressure cooking, and staying at or above that level dramatically reduces the risk of pot burn on the bottom surface.
- Independent kitchen testing and side by side recipe trials have found that thick tomato based recipes are several times more likely to trigger a burn warning when sauce is placed on the bottom rather than layered on top of other ingredients.
- Routine maintenance such as cleaning the sealing ring and float valve after each use has been shown in manufacturer guidance to extend cooker lifespan and reduce error codes, including burn message alerts linked to poor sealing and slow pressurization.
FAQ
Why does my pressure cooker show a burn notice even with plenty of liquid ?
A burn notice can appear even with enough total liquid if thick sauce or starchy ingredients are sitting directly on the bottom of the inner pot. The sensor reads the temperature at the bottom, not the average temperature of the whole food pot, so a sticky layer can still burn while the rest of the food looks soupy. Keeping thin liquid under the food and layering thick sauce on top helps the cooker build steam and pressure without scorching.
Is my food ruined after a burn warning or burn error ?
In many cases only a thin layer of food at the bottom has started to burn when the cooker shows a burn warning. Once pressure drops and the lid opens, you can gently transfer unburned food to a clean inner pot, add a bit more water or stock, and finish cooking on a shorter cycle. Unless the whole pot smells strongly of smoke, a calm pressure cooker burn notice fix can usually save the meal.
How much water should I add to avoid burn messages ?
Most electric pressure cookers, including common Instant Pot models, need at least 240 milliliters of thin liquid to generate enough steam for safe pressure cooking. Very large models or very dense recipes may benefit from 360 milliliters or more, especially when cooking pasta, rice, or beans. Always check your manual for the minimum liquid requirement and treat that number as a floor, not a target.
Can cleaning really affect how often I see a burn notice ?
Yes, cleaning has a direct impact on how often you see a burn notice or burn error. Burned on residue at the bottom of the inner pot creates hot spots, while a dirty sealing ring or float valve can prevent proper sealing and slow pressure buildup. Keeping the pot, lid, and steam path clean helps heat and steam move evenly, which reduces the chance of pot burn on the bottom.
Do some pressure cookers avoid burn notices better than others ?
Different pressure cookers use different heating profiles and sensors, so some models are more forgiving with thick recipes than others. A cooker with a thicker bottom pot and more precise electric pressure control may tolerate borderline recipes better, but no design can ignore physics if there is almost no thin liquid under the food. Learning to layer ingredients correctly and to adjust liquid for your specific model is more important than chasing a brand that promises to avoid burn completely.