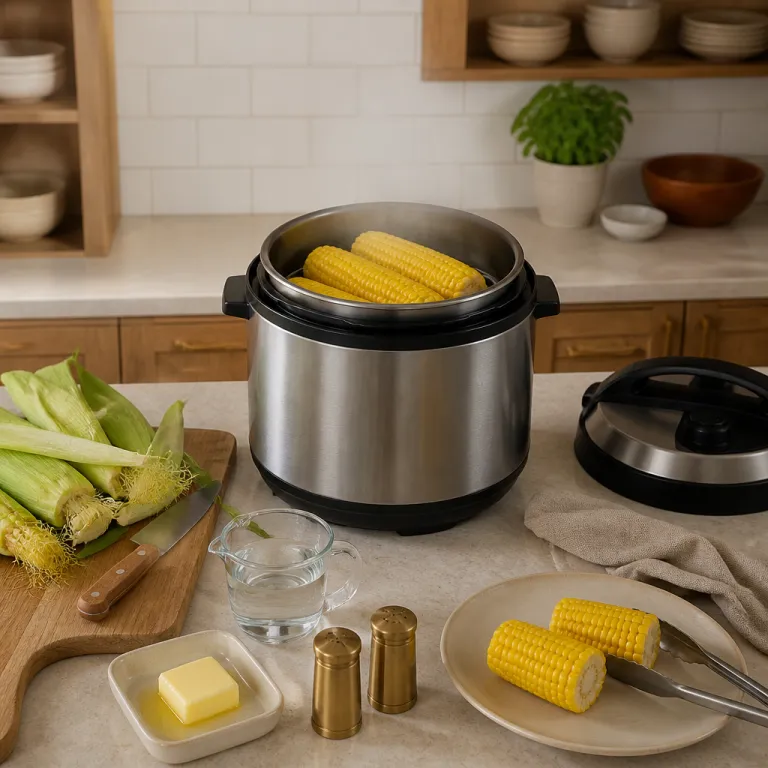
Why cooking corn on the cob in a pressure cooker changes everything
Sweet corn on the cob in a pressure cooker turns a simple vegetable into a reliably tender treat. When you use controlled high pressure in an electric pressure cooker, the kernels cook evenly and stay remarkably juicy, even if you prepare several ears at once. This method shortens overall cook time while preserving flavor, so your cooking pot stays efficient and your kitchen stays cool.
Traditional boiling often leaches flavor into the water and can overcook the corn before you notice. By contrast, cooking corn in a modern Instant Pot–style pressure cooker surrounds each cob with steam, which transfers heat faster and more gently than rapidly boiling water. The result is that you can cook corn with a precise cook time in minutes, not guesswork, and repeat the same recipe with consistent results every time.
For people new to electric pressure cooking, corn is an ideal beginner-friendly side dish. You only need a sturdy pot, a trivet, and enough water to generate steam, so the process feels manageable even if you have never used a pressure cooker before. Once you master this basic corn on the cob recipe, you will feel more confident experimenting with other dishes that use pressure, such as beans, soups, or even pressure cooker corn chowder.
Step by step method for perfect pressure cooked corn
Start by shucking the ears of corn and removing as much silk as possible, because stray silk strands can clog the trivet or float around the cooking pot. Rinse each cob under cool water, then trim the ends if needed so the corn fits comfortably inside your Instant Pot or any similar electric pressure cooker. Pat the ears dry lightly, since excess surface water is unnecessary for pressure cooking and can dilute seasoning later.
Next, place the metal trivet in the pot and add one cup of water to the bottom, which is enough liquid for steam without submerging the corn pieces in a typical 6-quart cooker. Arrange the ears of corn on the trivet in a crisscross pattern, stacking if necessary, but keep some space so steam can circulate during the short cook time. Secure the lid, set the valve to high pressure, then program the cook time between two and four minutes, depending on how crisp you prefer your pressure cooked corn.
When the programmed time is finished, perform a quick release of pressure so the cooking stops immediately and the kernels stay bright. Carefully open the pressure cooker away from your face, then use tongs to remove each cob and place it on a platter ready for butter and salt. If you want to explore more beginner-friendly pressure cooking recipes beyond vegetables, you can study a detailed pressure cooker pulled pork guide that uses similar principles of high pressure and precise timing.
Choosing fresh or frozen corn and adjusting cook time
Fresh corn brings the best natural sweetness, but frozen corn on the cob in a pressure cooker can still taste excellent when handled correctly. When you cook frozen corn, keep the cobs whole if possible and slightly increase the cook time to compensate for the colder starting temperature. You may also need a little extra water in the cooking pot, because frozen pieces release less moisture than fresh ears of corn during pressure cooking.
For very fresh summer ears, two minutes at high pressure usually keeps the kernels crisp-tender, while three to four minutes will produce softer results. Frozen corn cobs often benefit from four to five minutes of cook time, especially if they are thick or tightly packed in the pot. Always use a quick release for both fresh and frozen corn, because a natural release extends the effective cook time and can make the corn on the cob recipe mushy.
If you are planning a seasonal menu where the pressure cooker handles several recipes, corn becomes a flexible side dish that fits around your main course. You can pressure cook corn first, keep it warm, then reuse the same Instant Pot for meats or beans without washing the entire cooker between dishes. For holiday or outdoor gatherings, a resource on pressure cooker shortcuts for ribs, beans, and corn shows how to coordinate multiple recipes and manage time efficiently.
Seasoning ideas and serving corn as a versatile side dish
Plain buttered corn on the cob in a pressure cooker already tastes rich, but thoughtful seasoning turns it into a memorable side dish. Right after you remove the ears of corn from the cooking pot, brush them generously with melted butter so the heat helps the fat soak into each kernel. Sprinkle fine salt first, then add pepper, smoked paprika, or grated cheese, which will cling better to the butter-coated surface.
For a lighter approach, rub the hot corn with a cut lime and a pinch of chili powder, which balances sweetness with acidity and gentle heat. Another option is to mix softened butter with chopped herbs, garlic, and a little salt, then spread this compound butter over each cob while it is still steaming. Because the pressure cooker corn stays moist, these flavors penetrate quickly, so you need less seasoning overall to achieve a satisfying taste.
When serving a crowd, keep cooked cobs in a warm pot with a small amount of hot water at the bottom, elevated on a trivet so they do not become soggy. Guests can then add their own butter, sauces, or spice blends, turning a simple corn recipe into an interactive table experience. This strategy works especially well when your electric pressure cooker is already busy with other recipes, because you can transfer the cooked corn to a secondary pot and free the main cooker for meats or grains.
Beginner friendly safety and timing tips for electric pressure cookers
People new to electric pressure cooking often worry about safety, yet modern cookers include multiple automatic protections. Always check that the sealing ring is properly seated, the valve moves freely, and the pot has at least the minimum water required before you start any recipe. When you cook corn or other vegetables, never fill the cooking pot above the recommended line, because trapped steam needs space to build and release high pressure safely.
Timing also matters, since the displayed cook time does not include the period needed for the cooker to reach high pressure or to release it. For corn on the cob in a pressure cooker, expect a few extra minutes before and after the programmed cook time, especially if you start with cold water or frozen corn. Planning for this total time helps you coordinate other side dish recipes, such as salads or breads, so everything reaches the table together.
When the cycle ends, always use tools rather than hands to handle the hot pot, lid, and trivet, because steam burns happen quickly and silently. Tilt the lid away from you to direct any remaining steam away from your face, then place it on a heat-safe surface rather than a delicate countertop. With these habits, your Instant Pot or similar pressure cooker becomes a reliable partner, not an intimidating appliance, for both simple corn recipes and more complex dishes.
Planning complete meals with corn in an instant style pot
Once you feel comfortable cooking corn on the cob in a pressure cooker, you can start planning entire meals around this quick side dish. One strategy is to cook corn first, then use the flavorful liquid left in the pressurized pot as a base for soups or grains, which subtly carry the sweetness of pressure cooked corn. This approach reduces waste and layers flavor, especially when you are preparing several recipes in a single electric pressure cooker.
Another option is to use pot-in-pot cooking, where you place the corn on a trivet and set a smaller dish of seasoned potatoes or beans above it, both sharing the same water and high pressure. The cook time for these combinations must match, so choose ingredients that become tender in similar minutes to avoid overcooking. With practice, you will learn how to balance cook time, water volume, and corn quantity so every component reaches the right texture together.
For hot weather, pressure cooking keeps your kitchen cooler than long oven sessions, especially when you follow strategies from a guide on summer meal prep that keeps the kitchen cool. You can prepare corn on the cob, proteins, and grains in sequence, then chill some portions for later meals while serving others immediately as a fresh side dish. Over time, this style of planning turns your Instant Pot into a central tool for efficient weekly cooking, not just an occasional gadget for a single corn recipe.
Adapting the basic corn cob recipe for different tastes
The same basic method for corn on the cob in a pressure cooker adapts easily to different cuisines and dietary needs. For a smoky flavor without a grill, brush the cooked ears of corn with a mixture of melted butter and smoked paprika, then briefly char them under a broiler or on a hot pan. If you prefer dairy-free options, replace butter with olive oil or a plant-based spread, which still coats each cob and carries herbs or spices effectively.
Families with children often like to cut the cooked corn into smaller sections after cooking, making them easier to handle and portion. You can also strip the kernels from the cob and fold the tender pressure cooked corn into salads, tacos, or grain bowls, turning a simple side dish into part of a complete meal. Because pressure cooking preserves moisture, these kernels stay plump even when served cold, which makes them ideal for make-ahead recipes.
For people tracking sodium or fat intake, season the cooked corn lightly at first and offer stronger sauces on the side, so each person controls their own plate. You might prepare one batch with only salt and pepper, then set out flavored butters, oils, and spice blends for guests who want richer options. This flexible approach shows how a single electric pressure cooker technique can support varied tastes while keeping the core cook time and method consistent.
Key statistics about pressure cooked corn and electric pressure cookers
- According to nutrition data based on USDA references, fresh sweet corn typically contains around 3 to 4 grams of fiber per 100 grams, which makes each cob a meaningful contributor to daily fiber intake when served as a side dish.
- Independent efficiency comparisons of kitchen appliances suggest that using an electric pressure cooker can reduce energy consumption by roughly 50 to 70 percent compared with a traditional oven for similar cooking tasks, which means pressure cooking corn and other vegetables can lower household energy use over time.
- Food safety guidelines note that pressure cooking reaches temperatures above 100 degrees Celsius, so properly timed high-pressure cycles help reduce the risk of surviving bacteria on vegetables such as corn.
- Consumer surveys from major appliance retailers show that electric pressure cookers rank among the top small kitchen appliances purchased for meal prep efficiency, reflecting growing trust in pressure cooking for everyday recipes including corn on the cob.
FAQ about corn on the cob in a pressure cooker
How much water should I use for pressure cooked corn ?
Most electric pressure cookers need about one cup of water for a standard batch of four to six ears of corn, which is enough to generate steam without submerging the cobs. Always check your cooker manual, because some models require slightly more liquid for safe high-pressure operation. The corn should rest on a trivet above the water, not directly in it.
How long does it take to cook corn on the cob under pressure ?
For fresh corn on the cob in a pressure cooker, two to four minutes at high pressure usually produces tender results, depending on how crisp you like the kernels. Frozen corn often needs four to five minutes of cook time to reach a similar texture. Remember to account for the extra minutes the cooker needs to reach and release pressure.
Should I use a quick release or natural release for corn ?
A quick release works best for corn, because it stops the cooking immediately and helps preserve bright color and firm texture. A natural release extends the effective cook time and can make the kernels soft or mushy. Always keep hands and face away from the steam vent when performing a quick release.
Can I cook other foods with corn in the same pot ?
You can cook compatible foods with similar cook times in the same cooking pot, especially when using a trivet and pot-in-pot containers. For example, small potatoes or green beans often match the short cook time for corn on the cob in a pressure cooker. Avoid combining ingredients that require very different cooking times, or one component will overcook.
Is pressure cooked corn healthier than boiled corn ?
Pressure cooking uses less water and shorter cooking time than boiling, which helps retain more water-soluble nutrients in the kernels. Because the corn sits above the water on a trivet, fewer vitamins leach into the liquid compared with fully submerged boiling. The overall health impact also depends on toppings, so use butter and salt in moderation if you are watching fat or sodium intake.