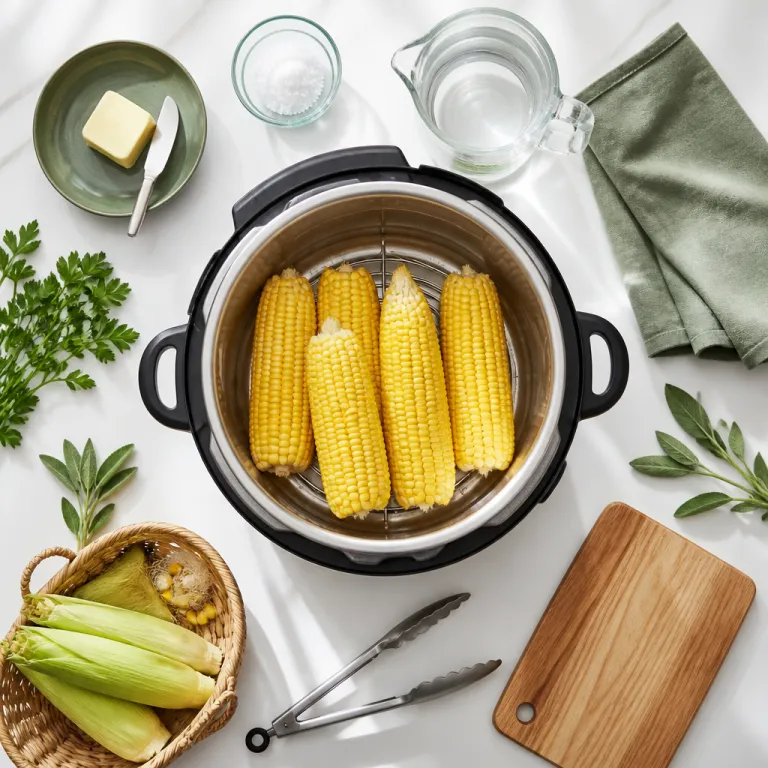
Why cooking corn on the cob in a pressure cooker suits busy home cooks
Cooking corn on the cob in a pressure cooker suits anyone who wants speed and consistency. When you cook fresh corn under high pressure, the heat penetrates the cob quickly and locks in sweetness while using less energy than a large pot on the stove. This method turns a simple side dish into a reliable staple that fits weeknight dinners and casual gatherings.
Traditional boiling needs a big pot of water and constant checking of cooking time. By contrast, an electric pressure cooker or Instant Pot uses a measured cup of water, a set cook time in minutes, and then either a quick release or natural release of pressure. Once you learn how long to cook corn for your preferred texture, you can repeat the same recipe in minutes with almost no effort.
Many beginners worry that pressure cooking will overcook delicate ears of corn. In practice, the short time in high-pressure steam keeps the kernels plump, and the cob stays juicy rather than waterlogged. You will also notice that the kitchen stays cooler, because the pot is sealed and the cooked corn does not fill the room with steam.
For people new to electric pressure cooking, corn is one of the easiest recipes to master. You simply place the ears of corn on a trivet, add the right amount of water, and let the pressure cooker handle the rest. This forgiving cook time makes corn on the cob recipes a gentle first step before trying meats, grains, or more complex one-pot corn dishes.
Another advantage is flexibility when using fresh corn or frozen corn. Fresh corn cooks in very few minutes, while frozen corn on the cob only needs a slightly longer cooking time under the same pot pressure. Either way, you get a dependable side dish that pairs with grilled meats, salads, or vegetarian mains without demanding constant attention.
Step by step method for perfect pressure cooked corn on the cob
To start cooking corn on the cob in a pressure cooker, prepare the ears first. Remove the husks and silk from each cob, then rinse the corn under cool water to wash away any remaining strands. Trimming the ends helps the ears of corn fit neatly inside the pot, especially in a smaller Instant Pot model.
Next, set up the pressure cooker pot with a metal trivet or steaming rack. Pour in 1 cup (240 ml) water for a 6 litre cooker, or slightly more water for an 8 litre pot, making sure the water level stays below the trivet. This small amount of water is enough for pressure cooking, because the sealed pot turns it into intense steam that surrounds the corn on the cob rather than boiling it.
Place the prepared ears of fresh corn horizontally on the trivet, stacking them in two layers if needed. You can stand shorter cob pieces upright when you want to fit more corn inside, but avoid packing them so tightly that steam cannot circulate. Secure the lid, set the valve to sealing, and choose the manual or pressure cook setting on your Instant Pot or other electric pressure cooker.
For fresh corn, set the cook time to 2 to 3 minutes at high pressure. If you prefer softer kernels, increase the time slightly, but remember that the residual heat during quick release or natural release will continue cooking. For frozen corn on the cob, add 1 to 2 extra minutes of cook time to compensate for the colder starting temperature.
When the timer ends, perform a quick release of pressure for crisp-tender kernels. Carefully turn the valve to venting, keeping your hand away from the steam, and wait until the float valve drops before opening the lid. If you want a softer texture, let the pressure drop naturally for 5 minutes before finishing with a quick release, which extends the total cooking time without changing the set cook time on the display.
Once the lid opens, use tongs to lift each cob from the cooker and place it on a platter. Brush the hot cooked corn generously with melted butter, then season with salt, pepper, or herbs while the surface is still steaming. This basic recipe forms the foundation for many easy side dish recipes, just as a reliable pressure cooker pulled pork method can anchor a full barbecue style meal.
Quick reference: pressure cooked corn on the cob
- Fresh corn, 6 litre cooker: 2–3 minutes on high pressure, quick release for crisp-tender.
- Fresh corn, softer texture: 3–4 minutes on high pressure, 5 minutes natural release.
- Frozen corn on the cob: 4–5 minutes on high pressure, quick release.
- Water: at least 1 cup (240 ml) in a 6 litre pot, slightly more in an 8 litre model.
- Visual cue: kernels should look plump, glossy, and feel slightly springy when pressed.
Adjusting cook time, texture, and seasoning for different types of corn
Not every ear of corn behaves the same way under pressure cooking. Very fresh corn from a local market often has higher natural moisture and sugar, so it reaches a tender bite in fewer minutes at high pressure. Older ears of corn from long storage may need slightly more cooking time to soften the cob and plump the kernels.
For crisp-tender corn on the cob texture, many home cooks find that 2 minutes at high pressure with a quick release works well. If you prefer a softer, almost creamy bite, try 3 to 4 minutes of cook time followed by a short natural release before opening the valve. Frozen corn on the cob usually benefits from 4 to 5 minutes of pressure cooking, because the cooker must first bring the frozen cob up to temperature.
Seasoning strategy matters as much as cooking time when you want memorable recipes. Salt added directly to the cup of water can slightly toughen some varieties of fresh corn, so many cooks season after cooking instead of during pressure cooking. You will get more control by brushing the hot cob with butter, then sprinkling salt, smoked paprika, chili powder, or grated cheese while the surface is still moist.
For a lighter side dish, replace part of the butter with olive oil and fresh herbs. You can cook corn plain in the pressure cooker, then roll each cob in a shallow dish of chopped parsley, coriander, or chives mixed with a small amount of melted butter. This approach keeps the base recipe easy while allowing you to vary flavours from one meal to the next.
When planning full meals, think of pressure cooked corn as one component in a broader one-pot strategy. Many families use their Instant Pot for fast mains such as beans, stews, or the kind of one-pot dinners highlighted in guides to pressure cooker meals prepped in under ten minutes. In that context, cooking corn on the cob in a pressure cooker becomes a flexible technique that you can pair with meats, grains, or vegetarian recipes without extending total cooking time.
Using Instant Pot features and safety practices for reliable corn results
Electric pressure cookers such as the Instant Pot simplify cooking corn on the cob by automating heat and pressure control. The pressure cook or manual button lets you select high pressure, then adjust cook time in minutes with simple plus and minus keys. Once you press start, the cooking process becomes hands off until it is time for quick release or serving.
For consistent results, always check that the silicone sealing ring is properly seated before you place the lid on the pot. A misaligned ring prevents the cooker from reaching high pressure, which lengthens cooking time and can leave fresh corn undercooked. Make sure the steam release handle is set to sealing, because an open valve will vent steam continuously instead of building pressure.
Water measurement is another key safety and quality factor. Most electric pressure cooker manuals specify a minimum of 1 cup (240 ml) water to generate enough steam for pressure cooking, and this rule applies when you cook corn as well. If you use too little water, the pot may show a burn warning before the cob is fully cooked, while too much water can partially boil the ears of corn instead of steaming them.
When the cook time ends, handle the quick release carefully to avoid burns. Turn the valve away from your face and hands, and wait until the float pin drops before opening the lid, because residual pressure can still force out hot steam. Lifting the lid away from you directs any remaining steam toward the back of the cooker, keeping your arms clear while you reach for the cob with tongs.
Some home cooks like to monitor internal food temperatures for safety and texture, especially when they move from simple corn recipes to meats cooked under pressure. A smart thermometer, such as the type explained in guides to smart meat thermometer cooking at home, can complement your pressure cooker by confirming doneness without guesswork. While you rarely need a probe for corn on the cob, building these habits around timing, pressure, and quick release will improve every pressure cooking session.
Flavor variations and serving ideas for pressure cooked corn on the cob
Once you master the basic method for cooking corn on the cob in a pressure cooker, flavour variations come easily. The neutral sweetness of fresh corn pairs with butter, herbs, spices, and sauces from many cuisines, so one simple recipe can become several different recipes. Because the cook time is short, you can prepare multiple seasoning bowls while the pot reaches high pressure.
For a classic approach, brush each hot cob with melted butter and sprinkle with flaky salt. To elevate this side dish, mix softened butter with garlic, lemon zest, and chopped parsley, then spread it over the cooked corn while it is still steaming from the pressure cooker. The residual heat melts the butter into the kernels, creating a glossy coating that clings to every row of corn.
Mexican inspired street corn is another popular variation that adapts well to pressure cooking. After the quick release, roll each cob in a mixture of mayonnaise and sour cream, then coat it with crumbled cheese, chili powder, and a squeeze of lime. This style turns simple pressure cooked corn into a rich snack or starter, while the underlying cooking time in the pressure cooker remains unchanged.
For lighter meals, cut the kernels from the cob after cooking and use them in salads or grain bowls. You can cook corn in the Instant Pot with plain water, then toss the kernels with tomatoes, beans, and herbs for a cold side dish that keeps well in the refrigerator. This approach also works with frozen corn, which softens quickly under pressure cooking and absorbs dressings without becoming mushy.
Families with children often appreciate easy seasoning options that keep the recipe approachable. Offer small bowls of grated cheese, mild chili powder, and flavoured butters so each person can finish their own ears of corn at the table. Because the base cook time in minutes is so short, you will find it simple to add pressure cooked corn on the cob to both everyday dinners and special occasions without crowding the stove.
Planning meals and troubleshooting common corn pressure cooking issues
Planning full meals around cooking corn on the cob in a pressure cooker helps you use time and energy efficiently. Since the cook time for corn is only a few minutes, you can prepare mains that rest while the corn cooks, such as grilled meats or baked tofu. This timing keeps the side dish hot without delaying the rest of the meal, and the sealed cooker maintains heat even if you wait a few extra minutes before serving.
If your fresh corn turns out too soft, shorten the cook time by one minute the next time you use the same variety. Remember that natural release adds extra cooking time, so choose quick release when you want firmer kernels and a crisper bite. On the other hand, if the cob feels too firm, increase the pressure cooking time slightly or allow a longer natural release before opening the valve.
Uneven results often come from mixing different sizes or temperatures of ears of corn in the same batch. Try to group similar sized cobs together, and avoid combining frozen corn with fresh corn in one cook cycle, because the frozen pieces need more minutes at high pressure. When you must mix them, place the frozen corn on the bottom closer to the water and trivet, and put the fresh ears on top so they receive slightly gentler steam.
Another common issue is water pooling on the plate when you serve the corn from the cooker. This usually means the recipe used too much water or the cook time was slightly long, causing the kernels to absorb and then release excess moisture. Reducing the water to the minimum recommended level and shaving a minute off the cook time often solves this problem while keeping the side dish tender.
For households that rely heavily on electric pressure cooking, corn becomes a reliable benchmark for calibrating timing and texture. When you can repeatedly cook corn to your preferred doneness, you gain confidence to handle more complex recipes that combine grains, vegetables, and proteins in one pot. That experience will pay off when you move from simple pressure cooked corn to layered dishes that use the same principles of pressure, water balance, and controlled quick release.
Key statistics about pressure cooking and corn on the cob
- Electric pressure cookers typically reduce cooking time for vegetables such as corn by around 50 to 70 percent compared with traditional boiling, according to manufacturer testing from brands like Instant Pot and Ninja based on side by side trials reported in their product literature.
- Studies on nutrient retention in steamed versus boiled vegetables show that shorter cooking time and reduced water contact can preserve higher levels of vitamin C and B vitamins, which supports the use of high pressure steam for corn on the cob in home kitchens, as summarised in peer reviewed food science journals.
- Household energy analyses from European efficiency agencies indicate that using a sealed pressure cooker can cut energy use for boiling tasks by roughly 30 to 60 percent, depending on stove type and batch size, when compared with open pot cooking in controlled test kitchens.
- Consumer surveys from major appliance retailers report that side dishes such as potatoes, rice, and corn rank among the top five uses for electric pressure cookers in everyday home cooking, alongside soups and stews, based on self reported usage data.
- Food safety guidelines from national agencies state that holding cooked vegetables such as corn above 60 °C (140 °F) for up to two hours is acceptable for serving, which aligns well with the heat retention of a closed pressure cooker on keep warm mode when monitored with a kitchen thermometer.
FAQ about cooking corn on the cob in a pressure cooker
How many ears of corn can I cook at once in an electric pressure cooker ?
A standard 6 litre pressure cooker or Instant Pot usually holds 4 to 6 full ears of corn laid horizontally on a trivet. You can cut larger cobs in half to fit more pieces, stacking them in two layers as long as you do not exceed the maximum fill line. Steam must circulate around the corn on the cob, so avoid packing the pot so tightly that the pieces press firmly against the lid.
Should I use quick release or natural release for corn on the cob ?
Quick release works best when you want crisp-tender kernels and a firmer bite. Releasing the pressure immediately after the cook time ends stops the cooking process, which prevents over softening of fresh corn. Natural release for 5 to 10 minutes is better if you prefer a softer cob or if you are cooking frozen corn that benefits from a little extra gentle heat.
Can I cook frozen corn on the cob directly from the freezer ?
Yes, you can cook frozen corn on the cob straight from the freezer without thawing. Place the frozen ears of corn on the trivet, add at least 1 cup (240 ml) water, and increase the cook time to about 4 to 5 minutes at high pressure. Use quick release to avoid overcooking, then check one cob and add an extra minute of pressure cooking if the kernels are still too firm.
Do I need to adjust water or time for different pressure cooker sizes ?
Larger electric pressure cookers, such as 8 litre models, usually need slightly more water to reach and maintain high pressure safely. However, the basic cook time for corn on the cob remains similar, because the pressure level and steam temperature are the same. Follow your cooker manual for minimum water requirements, then use the same 2 to 4 minute range for fresh corn and adjust only if your personal texture preference differs.
Is it better to season corn before or after pressure cooking ?
Most home cooks get more consistent results by seasoning corn after pressure cooking rather than adding salt directly to the cooking water. Salt in the cup of water can slightly toughen some varieties of corn, while post cooking seasoning with butter, herbs, and spices lets you adjust flavour at the table. You can still add aromatics such as garlic cloves or herb sprigs to the pot for subtle fragrance without heavily salting the kernels during the short cooking time.