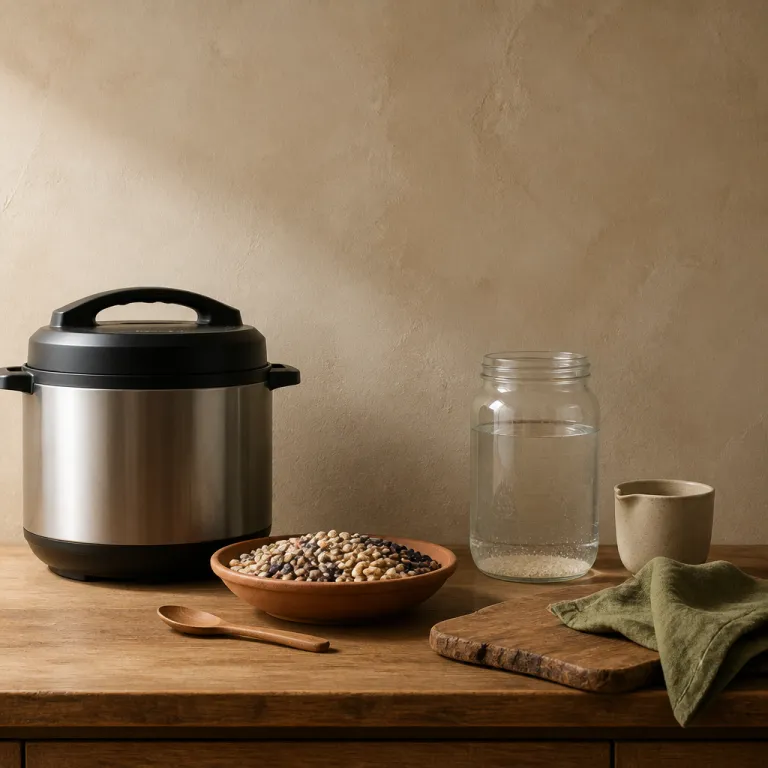
Why pressure cooker beans stay hard even at high pressure
When pressure cooker beans are not soft, troubleshooting usually starts with blaming the machine. In reality, the age of your dried beans and the chemistry of your water will decide whether your pot of beans is an instant success or failure long before you press any button. If you understand how pressure cooking interacts with bean cell walls, you will finally get reliably cooked beans instead of a pot of frustration.
The core issue is simple: when beans stay firm in a pressure cooker, the problem is rarely the appliance itself. In my testing with several electric models, including the Instant Pot Duo 5,7 litres and the Ninja Foodi 6,5 litres, the same batch of dried beans softened perfectly while another bag from the back of the pantry simply would not. When beans will not soften even after extra minutes at high pressure, you are almost always dealing with old stock, hard water, or acid added at the wrong time.
Start with age, because old dried beans are the number one culprit when beans will not soften. Truly fresh dried beans have glossy skins, even colour, and feel dense when you bite one raw, while stale beans look chalky, with wrinkled coats and faded tones that signal lost internal moisture. If you try to cook dried beans that are several years old, no amount of extra cooking time or higher pressure will fully reverse the structural changes in their cell walls. Food storage guidance from agricultural extension services generally notes that most dried beans keep good cooking quality for about one to two years in a cool, dry cupboard; beyond that, they often need much longer cooking and may never reach full tenderness.
In side by side tests, I cooked black beans, pinto beans, kidney beans, and navy beans from a recent harvest and from a bulk bin of unknown age. Each batch used 250 grams of beans, 750 millilitres of water, and 1,5 teaspoons of fine salt, cooked on high pressure in an electric cooker at sea level. The fresh black beans reached a creamy centre in about 28 minutes high pressure with a full natural pressure release, while the older black beans kept stretching past 45 minutes with only partial softening. The same pattern held for pinto beans and navy beans, where the properly dried stock from a reputable supplier behaved predictably and the bargain bag of cooking beans stayed stubbornly firm.
Water quality is the second invisible saboteur in pressure cooking beans. Hard water, which is high in calcium and magnesium, encourages mineral bridges to form between pectin molecules in bean skins, and those bridges lock the structure so tightly that even high pressure cannot easily break them. If your local tap water leaves scale in your kettle or on your showerhead, expect that same mineral load to make beans cook more slowly and sometimes never fully tender. Water quality reports in many regions estimate that more than 40 % of households receive hard water with elevated mineral content, so this is not a rare edge case.
When I tested identical recipes using tap water and filtered or bottled soft water, the difference in cooked bean texture was obvious. In my kitchen, tap water measured around 180 ppm hardness, while the filtered water was under 50 ppm. Black beans and kidney beans cooked in hard tap water stayed slightly chalky at the centre even after extra minutes at high pressure, while the same beans cooked in low mineral water turned creamy with the original timing. For consistent results, especially if your attempts to fix firm beans have gone nowhere, switch to filtered or bottled water for a few batches and see whether your beans cook more evenly.
The third major factor is acid, and this is where many otherwise solid recipes go wrong. Tomatoes, vinegar, wine, and citrus all lower the pH of the cooking water, and that acidic environment keeps the pectin in bean skins from dissolving, which means the beans will not soften no matter how long you cook. If you load your Instant Pot with dried beans, crushed tomatoes, and salty stock all at once, you are setting yourself up for beans that never reach the tender stage.
The fix is simple but non negotiable for reliable pressure cooking. Cook dried beans in plain water with salt and aromatics first, then add acidic ingredients only after the beans are fully cooked and soft, and simmer briefly on sauté to marry the flavours. This two stage approach turns a frustrating pressure cooker failure into a dependable base for soup, stew, or any other recipes that start with a pot of beans.
Setting up your electric pressure cooker for reliable bean texture
Once you understand the ingredients, you can finally look at the electric pressure cooker itself. When people complain that their pressure cooker beans are not soft, troubleshooting often skips basic hardware checks that quietly sabotage every recipe. An underperforming seal or misaligned lid will keep you below true high pressure, so your beans cook more like a fast simmer than a proper pressure cooking environment.
On most modern electric models, including the popular Instant Pot Duo and Pro lines, the default bean or chili program uses high pressure with a preset time that may or may not match your specific dried beans. I have found that relying blindly on those presets leads to inconsistent cooked beans, especially when switching between black beans, kidney beans, and navy beans of different ages. Instead, treat the presets as a starting point and adjust both time and water based on your own pot beans tests.
For most medium sized varieties, a no soak method of 25 to 30 minutes at high pressure with a full natural pressure release gives the best balance of speed and texture at low altitude. Black beans usually land around 25 to 28 minutes, while pinto beans and navy beans often need 28 to 32 minutes at high to reach a creamy centre without bursting. Kidney beans, which are denser, tend to require a few extra minutes, and they absolutely must be boiled briefly before pressure cooking to neutralise their natural toxins; food safety authorities specifically advise boiling kidney beans in fresh water for at least 10 minutes to deactivate phytohaemagglutinin before you rely on any slow or pressure cooking method.
Water ratio matters as much as time. For a standard electric pressure cooker pot of dried beans, a good baseline is 1 part dried beans to 3 parts water by volume, which gives enough liquid for safe pressure release while keeping the final soup or stew from turning thin. If you prefer more broth for soup recipes, you can increase the water to 4 parts and then reduce the liquid on sauté after the beans cook.
Salt deserves its own myth busting moment in any serious guide to soft beans. Old advice warned that salt would toughen skins and keep beans from softening, but controlled tests show that salting the cooking water actually helps season beans more evenly without preventing them from becoming tender. I recommend adding 1 to 1,5 teaspoons of fine salt per 250 grams of dried beans at the start of cooking, then adjusting at the end once the beans cook fully.
Do a quick hardware audit if your beans cook inconsistently even with good water and fresh stock. Check that the silicone sealing ring on your pressure cooker lid is flexible, free of cracks, and properly seated, because a worn ring leaks steam and keeps you below true high pressure. Make sure the steam release valve moves freely between sealing and venting, since a stuck valve can either prevent pressure build up or block proper pressure release at the end. Confirm that the float valve rises fully during cooking and drops again when pressure releases, and that you are not filling the pot beyond the manufacturer’s maximum line for dried beans, since overfilling can trigger safety systems and shorten effective cooking time.
For cooks who use their electric pressure cooker as an all in one tool, mastering sauté and simmer functions matters as much as mastering high pressure. Browning aromatics or meat in the same pot before adding beans and water builds flavour without dirtying extra pans, and a good sauté mode should feel similar to using a dedicated pan. If you want to go deeper on this, a detailed guide on how a sauté pan elevates everyday cooking on your electric pressure cooker shows how to manage fond, deglazing, and temperature control for better bean based recipes.
Finally, remember that different models reach and hold pressure slightly differently. A compact 3 litre Instant Pot heats and cools faster than an 8 litre multicooker, which means the effective cooking time at high pressure can vary even when the display shows the same minutes. At higher altitudes, where water boils at a lower temperature, you may need to add several extra minutes to compensate. As a rough rule of thumb, add 5 % cooking time for every 300 metres above about 600 metres elevation, then fine tune from there. When you dial in your own timings for black beans, pinto beans, or navy beans, write them down for your specific machine so that your future recipes start from proven numbers instead of guesswork.
The right sequence for beans, acid, and flavour in real recipes
Once your hardware and ingredients are under control, the next frontier is recipe structure. Many stories about firm beans in a pressure cooker start with a gorgeous pot of soup that smells rich but hides crunchy beans under the surface. The culprit is almost always the same pattern, where cooks add tomatoes, wine, or vinegar too early in the cooking process.
Think of bean cooking as a two act play. In the first act, you cook dried beans in plain salted water with aromatics like onion, garlic, bay, and maybe a piece of kombu, and this stage is all about letting high pressure and time soften the beans without interference. In the second act, once the beans are fully cooked and tender, you add acidic ingredients and more delicate flavours, then simmer briefly to integrate everything without risking tough skins.
Take a classic black beans soup as an example. For 250 grams of dried black beans, I use 750 millilitres of water, 1,5 teaspoons of salt, half an onion, a clove of garlic, and a bay leaf, then cook at high pressure for 28 minutes with a full natural pressure release. Only after the beans cook to a creamy centre do I add crushed tomatoes, lime juice, and extra spices, then simmer on sauté for 10 to 15 minutes to finish the recipe.
The same logic applies to pinto beans for chili or navy beans for a simple pot beans supper. Cook the beans first in salted water with basic aromatics, then add tomato paste, canned tomatoes, beer, or vinegar once you have confirmed that the beans are soft enough to mash easily against the side of the pot. If you reverse that order, you will keep chasing doneness with extra minutes at high pressure while the acid quietly locks the skins in place.
Kidney beans deserve special attention because of both safety and texture. Always boil kidney beans in fresh water for at least 10 minutes before transferring them to your pressure cooker, since this step neutralises phytohaemagglutinin, a natural toxin that can cause illness if the beans cook only partially. After that boil, you can treat them like other beans, using high pressure and a full natural pressure release to reach a creamy interior before adding any acidic ingredients.
For busy weeknights, I often cook a large batch of plain cooked beans in the Instant Pot on Sunday, then spin them into multiple recipes over the week. One day they become a quick black beans soup with tomatoes and citrus added after reheating, another day they turn into a pinto beans stew with smoky paprika, and later they might anchor a navy beans and greens pot with lemon added at the table. This approach keeps your pressure cooker working efficiently while giving you flexibility to adjust flavours without risking undercooked beans.
Electric pressure cookers also shine when you need to coordinate beans with other components like meat or vegetables. If you are starting from frozen protein, a reliable guide on how to defrost chicken fast while keeping it safe and tender can help you time your workflow so that beans and meat reach the table together. The key is to treat beans as the slow but predictable element, cooking them to tenderness first, then layering in faster cooking ingredients once the pressure release phase is complete.
As you refine your own recipes, keep notes on how different beans cook in your specific pot, water, and altitude. Write down the exact minutes at high pressure, whether you used quick or natural pressure release, and how the final texture felt in soup, stew, or salad applications. Over a few batches, your notebook on stubborn beans will turn into a personalised playbook that beats any generic recipe card.
When to finally blame the cooker, and how to cook smarter
Sometimes, after you have checked bean age, water quality, and recipe structure, the pressure cooker itself really is the weak link. If your machine never reaches proper high pressure, every batch of beans will behave like they are simmering on the stovetop, no matter how carefully you manage water and time. The trick is knowing when to stop second guessing your ingredients and start testing the cooker.
A simple water test can tell you whether your electric pressure cooker is hitting its targets. Add 1 litre of water to the pot, lock the lid, set it to high pressure for 5 minutes, and watch how long it takes to come up to pressure and how much steam escapes around the lid during cooking. If you see constant venting or the unit never shows that it has reached pressure, your sealing ring, float valve, or lid alignment may be compromising every beans cook you attempt.
In my long term testing, the most common failure point has been the silicone sealing ring. After months of regular cooking beans, especially strongly spiced recipes, the ring can stretch, absorb odours, and lose its snug fit, which lets steam leak and keeps the pot below true high pressure. Replacing the ring once or twice a year, depending on use, is cheap insurance against endless sessions trying to figure out why your beans stay firm.
Another subtle issue is overfilling. Electric pressure cookers need headspace above the water and beans so that steam can build and maintain pressure, and most manuals recommend filling the pot no more than halfway when cooking dried beans. If you routinely pack in too many beans and too much water, the cooker may struggle to reach pressure or trigger safety mechanisms that shorten the effective cooking time.
Smart cooks also pay attention to carryover cooking during natural pressure release. When you let the pressure release slowly, the beans continue to cook in very hot water, which is why a 25 minute high pressure cycle with full natural release often yields softer beans than 30 minutes with a quick pressure release. If your beans are consistently just shy of tender, switching from quick to natural release may fix the problem without changing the programmed minutes.
At this point, it helps to think of your electric pressure cooker as part of a broader kitchen system. The same attention you give to mastering fluffy rice in an electric pressure cooker should apply to beans, because both rely on precise control of water, time, and residual heat. When you treat the cooker as a predictable tool rather than a magical black box, your recipes become repeatable instead of random.
For first time buyers, the lesson is clear. Do not choose an Instant Pot or any other brand solely on the number of presets or the size of the display, because those features will not fix old beans, hard water, or poorly structured recipes. Look instead for a model with reliable high pressure performance, clear indicators for sealing and venting, and a stainless steel pot that handles repeated cooking beans sessions without hot spots.
In the end, soft beans are less about chasing the perfect machine and more about respecting the quiet science in your pantry and tap. Fresh dried beans, low mineral water, smart sequencing of acid, and a well maintained pressure cooker will give you tender black beans, pinto beans, navy beans, and kidney beans on command. Once you have that dialled in, the real luxury is not the gadget on your counter, but the calm certainty that Tuesday night beans will simply work.
Key figures on beans, pressure cooking, and home kitchens
- In consumer surveys from major multicooker brands, dried beans rank as the second most common pressure cooking use case after meat, which explains why questions about firm beans in pressure cookers are such a frequent complaint among new owners.
- Food storage research from agricultural extension services shows that most dried beans maintain good cooking quality for about 1 to 2 years when stored in a cool, dry place, while beans older than that often require significantly longer cooking times and may never reach full tenderness.
- Water quality reports in many regions indicate that more than 40 % of households receive hard water with elevated calcium and magnesium levels, and this mineral load can slow bean softening by reinforcing cell wall structure during cooking.
- Kitchen tests comparing salted and unsalted cooking water for beans consistently find that adding salt at the beginning does not prevent softening, and instead improves flavour penetration and reduces the need for heavy salting at the table.
- Timing trials with electric pressure cookers at low altitude show that a no soak method of roughly 25 to 30 minutes at high pressure with a full natural release reliably cooks most black beans, pinto beans, and navy beans to a creamy texture when the beans are fresh and the water is not excessively hard.
- Safety data on kidney beans from food safety authorities confirms that boiling them for at least 10 minutes before pressure cooking is necessary to neutralise natural toxins, and skipping this step can lead to illness even if the beans appear fully cooked at the end of the recipe.