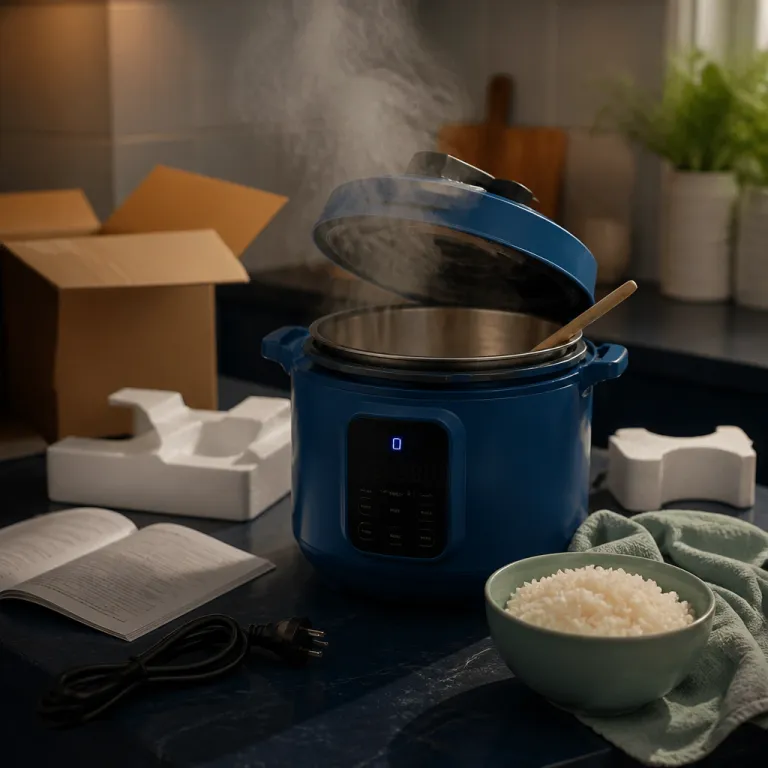
How to use an electric pressure cooker without panic
Learning how to use an electric pressure cooker starts before you ever plug it in. Your new multicooker may look like a spaceship, but its job is simple and predictable once you understand the main parts. Think of this first session as driver training, not a race to dinner.
Set the cooker on a stable, heat resistant counter, away from overhead cabinets and anything that steam could damage. Leave at least 15 centimeters of space around the pot so heat and steam can vent safely during pressure cooking, and keep children or pets from touching the hot outer body. An electric pressure model will stay cooler on the sides than a stovetop pressure cooker, but the lid, steam release area, and top metal parts still get very hot.
Lift off the lid and find the removable inner pot, the power cord, and any accessories such as a steaming rack or trivet. Most modern cookers use a stainless steel inner pot, although some brands offer nonstick pots that scratch more easily and do not tolerate metal utensils. Check that the pot sits flat in the base, because a tilted pot can interfere with the sensor that controls heat and pressure.
Now examine the top of the lid closely, because this is where confidence starts. You will see a steam release handle or lever, a small float valve that pops up under high pressure, and a silicone sealing ring tucked inside the pot lid. The sealing ring must be fully seated in its groove or the cooker will never reach high pressure, so run your fingers around it and press it into place.
On the front control panel, find the main pressure cook or manual button, the plus and minus buttons for minutes, and any presets such as soup, beans, or rice. These presets are just shortcuts that choose a pressure level and cooking time for you, but you can always adjust the minutes manually. For your first cook, you will ignore most presets and focus on one simple pressure cooker program that you can repeat.
At a glance: first-time setup checklist
- Place the electric pressure cooker on a clear, level surface with space for steam to vent.
- Remove the lid, take out the inner pot and accessories, and wash removable parts before first use.
- Reinsert the inner pot, making sure it sits flat against the heating plate in the base.
- Check that the silicone sealing ring is clean, flexible, and firmly pressed into its groove.
- Locate the float valve, steam release handle, and main pressure cook/manual button on the control panel.
- Read the safety section of your user manual so you know the minimum liquid requirement and error codes.
The water test that teaches real pressure cooking
Your first real lesson in how to use an electric pressure cooker should be a plain water test. Cooking only water removes the fear of ruining food, and it lets you watch how the cooker behaves from start to finish. You will see how long it takes to build pressure, what normal steam looks like, and how the release valve works.
Place the stainless steel inner pot back into the base and pour in 1 liter of cold water. Stay under the maximum fill line etched inside the inner pot, because overfilling is one of the three classic beginner mistakes in pressure cooking and it can cause sputtering from the steam release. Make sure the pot lid is clean, then align the arrows and twist until the lid locks with a clear click.
Set the steam release handle or valve to the sealing position, not to venting. On many electric pressure cookers, the words “sealing” and “venting” sit near the top pressure area of the lid, but some models use icons instead of text. If the valve stays in the venting position, the cooker will boil water endlessly without ever reaching high pressure.
Press the main pressure cook button or the manual button, then use the plus and minus controls to set 5 minutes of cooking time. The display will usually show “On” while the cooker heats the water, and only start counting down the minutes once high pressure is reached. During this preheat phase, you will hear gentle clicks as the cooker cycles heat and see a little steam from the pot instant release area, which is normal.
As pressure builds, the float valve on the lid will rise and lock, signaling that the cooker is sealed. At this point, the lid will not open and the electric pressure system will regulate heat automatically to maintain stable pressure. When the 5 minutes end, the cooker will beep and either start a keep warm mode or simply stop, depending on your model.
For this first test, let the cooker sit for 10 to 15 minutes to cool down naturally. This natural release allows steam and pressure to drop slowly without touching the steam release handle, which is easier for nervous beginners. Only after that waiting time should you carefully move the valve to venting to release any remaining pressure and open the lid away from your face.
Once the lid is off, look at the water level and the inner pot surface. You will see condensation on the pot lid and some steam escaping, but the stainless steel interior should look unchanged and clean. This simple water test builds trust in the cooker, the lid, and the release valve before you ever cook food.
When you feel comfortable with this water test, you can apply the same steps to gentle vegetables such as corn on the cob. A detailed guide to making tender corn in a pressure cooker shows how a short time under high pressure followed by a quick release can keep kernels juicy and bright. Practicing with forgiving vegetables helps you learn how minutes, heat, and steam release interact without risking an entire dinner.

Understanding the anatomy of your pressure cooker
Knowing how to use an electric pressure cooker also means knowing every part by name. When you understand what each piece does, the cooker stops feeling mysterious and starts feeling like a predictable tool. You will troubleshoot problems faster and avoid the frustration of recipes that never quite work.
Start with the inner pot, which holds all the water and food during pressure cooking. Most popular electric pressure cookers, including the Instant Pot Duo and similar cookers, use a stainless steel inner pot with measurement lines for cups and liters. These markings help you add enough water to build steam while staying below the maximum safe fill level.
The pot lid contains the most important safety parts, including the sealing ring, the float valve, and the steam release mechanism. The silicone sealing ring creates an airtight barrier between the lid and the cooker body, and a worn or twisted ring will leak steam and prevent high pressure from building. Many experienced cooks keep two sealing rings, one for savory recipes and one for neutral or sweet recipes, because the ring can absorb strong aromas.
The float valve is a small metal or plastic pin that rises when the cooker reaches pressure. When the float valve is up, the lid locks and you must use either a quick release or a natural release to lower the pressure before opening. If the float valve never rises, you likely have not added enough water, the sealing ring is not seated, or the steam release valve is left open.
On top of the lid, the steam release handle or knob controls how you release pressure. Turning it to venting performs a quick release, which sends a strong jet of steam upward and rapidly lowers pressure inside the pot. Leaving it in the sealing position after cooking ends allows a natural release, which slowly reduces pressure as heat dissipates and steam condenses.
Inside the lid, you will find a small anti block shield or steam cap that protects the release valve from food particles. This piece must stay clean so that steam can move freely through the steam release path when you release pressure. After cooking starchy recipes such as beans or pot recipes with thick sauces, remove this shield and rinse it under water to prevent clogs.
The electric base houses the heating element and the sensors that control temperature and pressure. Unlike a stovetop pressure cooker, which relies on you to adjust burner heat, an electric pressure model automatically cycles power to maintain stable pressure. This automation is why many home cooks feel comfortable leaving the kitchen for a few minutes while the cooker works.
For deeper projects such as bone broth, the anatomy of the cooker really shows its strengths. A well written guide to making bone broth in a pressure cooker explains how two hours at high pressure can extract collagen and flavor that usually require a full day of simmering on the stove. Understanding how the inner pot, lid, and release valve work together makes these long recipes feel routine instead of risky.

The three beginner mistakes and how to avoid them
Most first time users who ask how to use an electric pressure cooker run into the same three problems. They do not add enough water, they overfill the pot, or they yank the steam release too early. Each mistake is easy to prevent once you know what to watch for.
Every pressure cooker, whether an Instant Pot or another brand, needs a minimum amount of thin liquid to create steam. As a rule of thumb, plan for at least 250 milliliters of water or broth in the inner pot for most recipes, unless your manual specifies a different minimum. If you try pressure cooking thick sauces with almost no added liquid, the cooker may show a burn warning because the bottom overheats before enough steam forms.
Overfilling is the opposite problem and can be just as frustrating. The maximum fill line inside the stainless steel inner pot is there to prevent food from blocking the steam release path when you release pressure. For foods that expand, such as rice, beans, or pot recipes with pasta, stay below two thirds full to leave room for bubbling and foam.
The third mistake is treating the quick release like a light switch instead of a control. Flipping the steam release valve from sealing to venting the instant the timer beeps can cause starchy liquid to spray from the top pressure area, especially with thick stews. A better habit is to wait 5 to 10 minutes for a partial natural release, then perform a controlled quick release by nudging the valve slowly.
New users also underestimate how hot the steam can be when they release pressure. Always keep your hand to the side of the pot lid and use a long utensil or a heat safe glove to move the valve, because the jet of steam can burn skin instantly. Aim the steam release away from cabinets, and never lean over the cooker while you vent.
Another subtle error is trusting every preset button without thinking about the actual food in the pot. Presets on pressure cookers are tuned for average quantities and may overcook small batches or delicate ingredients, so use them as starting points rather than strict rules. Over time, you will learn that a chicken thigh recipe might need fewer minutes than the generic poultry button suggests, especially if you plan a full natural release.
Finally, remember that recipes written for stovetop pressure cookers often reach higher pressure than electric pressure models. When you adapt those recipes, you may need to add a few minutes of cooking time or allow a longer natural release to reach the same tenderness. Respecting these differences keeps your first pressure cooking experiments predictable and safe.
Natural release versus quick release for your first real meal
Once you have mastered the water test, your next step in how to use an electric pressure cooker is a forgiving recipe. A simple lentil soup or vegetable stew is ideal, because these recipes tolerate a wide range of cooking times. You will practice setting minutes, choosing a release method, and checking doneness without worrying about dry meat or mushy pasta.
Start by sautéing aromatics directly in the inner pot if your cooker has a sauté button. This function uses direct heat from the base, just like a stovetop pot, and it builds flavor before pressure cooking begins. After softening onions and garlic in a little oil, add vegetables, lentils, water or broth, and seasonings, staying below the maximum fill line.
Lock the lid, set the steam release valve to sealing, and choose a pressure cook program for 10 to 12 minutes at high pressure. Remember that the total time includes both the preheat phase and the actual pressure cooking minutes, so plan for about 25 to 30 minutes from start to finish. When the cooker beeps, resist the urge to touch the valve and let a full natural release happen for this first real meal.
Natural release means you do nothing while the cooker cools and the float valve drops on its own. This slow pressure release keeps soups and stews from splattering through the steam release path, and it gives beans or lentils a little extra gentle cooking time. For many pot recipes with lots of liquid, the difference between 10 minutes of pressure and 12 minutes of pressure is small once you add a full natural release.
Quick release, by contrast, is best reserved for foods that overcook easily. When you cook vegetables, seafood, or delicate pasta, you will often use a quick release to stop the cooking process as soon as the timer ends. In those cases, move the steam release handle carefully to venting and stand back while steam rushes out of the pot lid.
For your first week with the cooker, lean toward natural release or partial natural release whenever you are unsure. Waiting 10 extra minutes may feel slow compared with the instant image in marketing, but it dramatically reduces the risk of tough meat or blown out beans. Over time, you will learn which recipes demand a fast quick release and which benefit from a slower pressure release curve.
As you gain confidence, you can branch into recipes that start from frozen ingredients, such as chicken thighs or roasts. A detailed guide to safely pressure cooking frozen meat in an Instant Pot explains how extra minutes under high pressure and enough water in the inner pot keep food safe and tender. These more advanced recipes still rely on the same basics of heat, steam, and controlled release that you learned with soup.
Normal sounds, warning signs, and safe cleanup after cooking
Many people who ask how to use an electric pressure cooker worry most about noise and steam. The cooker will hiss, click, and vent small puffs of steam during preheating, and all of that is normal behavior. What matters is learning the difference between controlled steam release and signs that something is wrong.
During the preheat phase, you may see wisps of steam escaping from the top pressure area of the lid. This light venting continues until the sealing ring softens and the float valve rises, at which point the cooker seals and pressure cooking begins. If heavy steam keeps pouring from the steam release valve and the float valve never pops up, stop the cooker and check that the valve is set to sealing and the pot lid is locked correctly.
Clicking sounds usually come from the heating element cycling on and off to control heat. Electric pressure cookers use sensors to maintain a steady internal temperature, so you may hear several clicks as the cooker approaches high pressure. Loud banging, sputtering liquid from the release valve, or error codes on the display are different and deserve immediate attention.
If you see thick starchy foam or food spraying from the steam release during a quick release, the pot is probably too full or the recipe is too thick. In that case, carefully move the valve back toward sealing to slow the release pressure, then let the cooker sit for a few minutes before trying again. Next time, reduce the fill level or add more water to thin the mixture for safer pressure release.
Once cooking is finished and pressure has dropped, always open the lid away from your face. Tilt the pot lid so that steam escapes toward the back of the cooker, not toward your body, because trapped steam can still burn even after the float valve falls. Remove hot food with heat safe tools, and never reach into the inner pot with bare hands while it is still hot.
Cleaning starts with unplugging the cooker and letting the inner pot cool slightly. Lift out the stainless steel inner pot and wash it with warm soapy water, then dry it thoroughly before returning it to the base. Remove the silicone sealing ring from the lid, wash it separately, and inspect it for cracks or strong odors that might transfer to future recipes.
Next, check the steam release parts on the lid. Pop off the small anti block shield, rinse it under running water, and make sure the steam release path is clear of food particles that could block steam release in later cooks. Wipe the outer cooker body with a damp cloth, but never immerse the electric base in water.
Regular cleaning keeps the sealing ring flexible, the release valve responsive, and the inner pot free from burnt residue. Treat the cooker like any other serious piece of kitchen equipment, and it will reward you with reliable performance for thousands of meals. The real measure of success is not how shiny the pot looks, but how calmly you can move from unboxing to cleanup on a busy weeknight.
A forgiving first recipe and how to adapt others
By now, how to use an electric pressure cooker should feel less abstract and more like a routine. Your first real recipe can be a simple chicken and vegetable stew that uses basic pantry ingredients. This kind of dish is hard to ruin, even if your timing or release method is not perfect.
Start by adding a tablespoon of oil to the inner pot and using the sauté function to brown bite sized pieces of chicken for a few minutes. Browning builds flavor through direct heat, and it also teaches you how quickly the pot responds when you change cooking modes. After the chicken has some color, add chopped onions, carrots, potatoes, salt, pepper, and enough water or broth to barely cover the food.
Lock the lid, set the steam release valve to sealing, and choose 8 to 10 minutes at high pressure. The total time from pressing the pressure cook button to serving will be closer to 30 minutes, because the cooker needs time to build pressure and then time for a partial natural release. Let the pressure drop naturally for 10 minutes after cooking, then perform a gentle quick release to finish.
When the float valve drops, open the pot lid carefully and check the chicken for tenderness. If the meat is not fully cooked, you can always return the lid, reset the pressure cook program for a few extra minutes, and let the cooker come back to pressure. This flexibility is one reason pressure cookers excel at weeknight recipes, because you can adjust on the fly without starting from zero.
As you explore more pot recipes, pay attention to how different foods respond to pressure. Beans and grains often need both enough water and a full natural release to finish cooking gently, while vegetables and seafood usually benefit from shorter times and a quick release. Over time, you will learn to read recipes and decide whether to follow the suggested release method or adapt it to your cooker and your taste.
For richer projects such as bone broth, braised short ribs, or dense stews, plan for longer minutes at high pressure and a full natural release. These recipes take advantage of the sealed environment, where steam and pressure break down connective tissue faster than any stovetop simmer. The key is always the same combination of adequate water, correct lid sealing, and patient pressure release.
Remember that presets on an Instant Pot or other electric pressure cookers are optional helpers, not rules. Once you understand how to set time, choose high pressure, and manage steam release, you can adapt almost any stovetop or slow cooker recipe to the pressure cooker with a little testing. In the end, what matters is not the number of buttons on the front panel, but how confidently you can turn cold ingredients into hot dinner on a Tuesday night.
Key figures about electric pressure cookers and home cooking
- According to the Association of Home Appliance Manufacturers (AHAM), summarized in industry overviews published around 2017–2018, electric pressure cookers can reduce cooking time for tough cuts of meat by up to about 70 percent compared with conventional oven braising; always check the latest AHAM data for current figures.
- U.S. Department of Energy efficiency testing on covered versus uncovered cooking methods indicates that pressure cooking can use roughly 50 to 75 percent less energy than traditional stovetop boiling, because the sealed pot reaches higher temperatures with less heat loss; consult current DOE consumer guidance for precise numbers.
- Consumer surveys from major retailers and market analysts, such as reports on Instant Pot ownership published in the late 2010s, consistently find that more than half of owners primarily use the pressure cook function for soups, stews, and beans, confirming that forgiving recipes are the most common entry point for beginners.
- Food safety guidelines from the United States Department of Agriculture (USDA Food Safety and Inspection Service) state that cooking large pieces of meat from frozen in an electric pressure cooker is safe when the food reaches at least 74 degrees Celsius (165°F) internally; always follow the most recent USDA FSIS recommendations.
- Market research firms tracking small kitchen appliances estimate that multifunction pressure cookers now appear in roughly one third of American households, reflecting a steady shift away from single purpose slow cookers toward more versatile electric pressure appliances; specific percentages vary by study and year.
Note: The figures above summarize trends reported by AHAM, the U.S. Department of Energy, USDA FSIS, and commercial market research between roughly 2015 and 2022. For exact statistics, consult the latest primary reports from those organizations.
FAQ: first time electric pressure cooker use
How much water should I use for my first pressure cook
For a basic water test, use about 1 liter of water in the inner pot. This amount is enough to build steam and reach high pressure without risking overfilling. Always stay above your cooker’s minimum liquid requirement and below the maximum fill line.
Is natural release safer than quick release for beginners
Natural release is usually easier and calmer for new users, because you do not have to touch the hot steam release valve immediately after cooking. Letting pressure drop on its own reduces splattering and gives food a little extra gentle cooking time. Once you feel comfortable, you can use quick release for vegetables and other delicate foods that overcook easily.
Can I open the lid while the cooker is under pressure
No, you should never try to open the lid while the cooker is under pressure. The float valve locks the lid mechanically whenever the pot is pressurized, and forcing it could cause serious burns from escaping steam. Always wait until the float valve drops and the cooker signals that pressure has fully released.
Do I need to brown meat before pressure cooking
You do not have to brown meat, but doing so improves flavor and texture. Using the sauté function in the inner pot lets you build a fond on the bottom, which enriches soups and stews once you add water or broth. For very simple weeknight meals, you can skip browning, but expect a milder taste.
How often should I replace the sealing ring
Most manufacturers recommend inspecting the silicone sealing ring regularly and replacing it every 12 to 24 months, depending on use. If the ring becomes cracked, stretched, or holds strong odors even after washing, it is time for a new one. A fresh sealing ring helps the cooker reach and maintain pressure reliably for all your recipes.
Troubleshooting: common first-use problems
| Problem | Likely cause | Quick fix |
|---|---|---|
| Cooker never reaches pressure | Steam release valve left on venting, sealing ring not seated, or not enough liquid | Turn valve to sealing, reseat the silicone ring, and add at least the minimum liquid. |
| Steam and liquid spraying from valve | Pot overfilled or mixture too thick and starchy | Move valve back toward sealing, wait a few minutes, then release again more slowly next time with less food or more liquid. |
| Burn or “food burn” warning | Not enough thin liquid, thick sauce on the bottom, or scorched bits from sautéing | Cancel the program, scrape the bottom clean, add more water or broth, and restart. |
| Strong lingering odors in the lid | Sealing ring absorbed aromas from previous savory dishes | Wash the ring thoroughly, air it out, or replace it; consider keeping separate rings for sweet and savory recipes. |