Pressure cooker mistakes to avoid before you even start cooking
Most pressure cooker mistakes to avoid actually begin before any cooking starts. Your electric pressure cooker looks simple on the counter, yet the way you set up the pot will decide whether dinner is silky and tender or a stressed scramble to release pressure safely. Treat the cooker like a compact engineered system, not just another kitchen gadget.
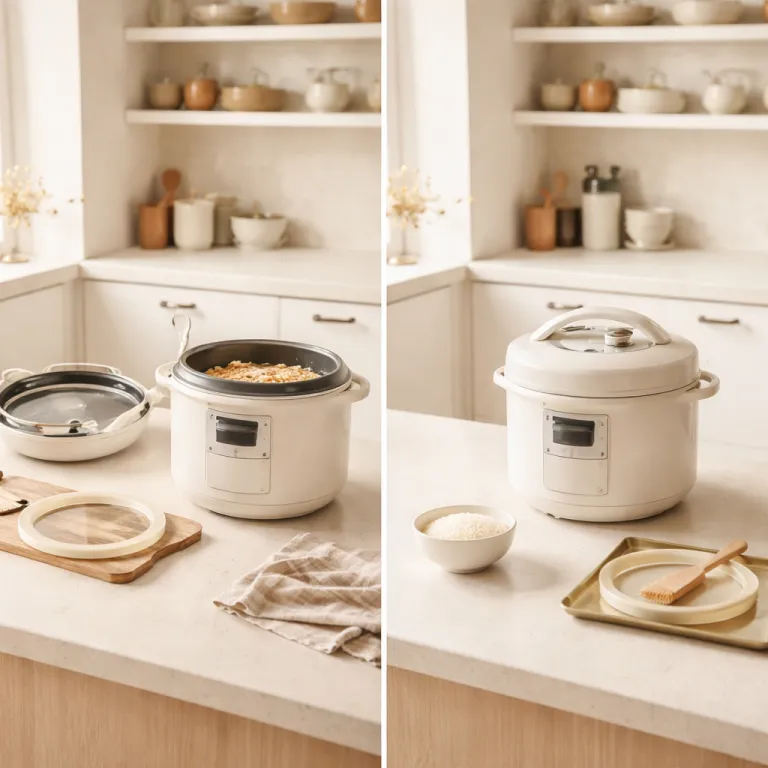
The first common error is skipping a careful cooker check before every use. You should inspect the silicone sealing ring, the float valve, and the pressure release knob, because any damage or stuck food residue will change the cooking pressure and extend cooking time unpredictably. When busy home cooks rush, they often do not notice dried cooker food on the rim of the inner pot, which prevents a full seal and forces the cooker to boil off water instead of building steam.
Another frequent problem is overfilling the pot, which many new pressure cookers owners learn the hard way. For most pressure cooking tasks you should stay below two thirds of the stated capacity, and for beans, grains, or foamy foods you should fill the cooker only halfway to maintain texture and keep thick liquid from clogging the pressure release system. If you ignore that max line, the cooker pressure can spike, the safety valve may trigger, and you will end up with starchy foam blasting toward the quick release vent.
Water and other liquid amounts are the next big trap in this list of pressure cooker mistakes to avoid. Electric pressure cookers need far less water than stovetop cookers, because almost no steam escapes once the lid locks and the cooker pressure stabilizes. A practical guideline drawn from several major manufacturer manuals is to add at least 240 ml (1 cup) of thin liquid in a 3 litre cooker and 360 ml (1.5 cups) in a 6 to 8 litre model, then adjust cooking times rather than flooding the pot and diluting flavor.
Home cooks also underestimate how altitude and batch size change cooking time and cooking pressure. If you live above roughly 600 meters, you will need to extend cooking times for dense food cooking like beans or large meat joints, since the lower atmospheric pressure reduces the effective cooker pressure inside the sealed pot. A practical rule of thumb, consistent with altitude adjustments recommended by the United States Department of Agriculture (USDA) for pressure canning, is to add about 5 percent cooking time for every additional 300 meters above 600 meters, especially for recipes that run longer than 20 minutes under pressure.
Doubling a recipe in a large electric pressure model such as a 6 litre Instant Pot or a 5.7 litre Ninja Foodi usually means adding a few extra minutes, because a bigger mass of cooker food simply takes longer to heat through. For example, a 500 g batch of dried beans might need 30 minutes at high pressure in a 3 litre cooker, while 1 kg in a 6 litre pot often cooks more evenly at 33 to 35 minutes plus a full natural release.
Finally, think about safety and information before you even plug in the cooker. Read the manual’s section on how to open pressure safely and how the pressure release valve behaves if it is blocked, then check the manufacturer’s privacy policy so you understand what data a Wi Fi enabled electric pressure model might collect. These steps sound dull, yet they are the foundation that lets you cook under high pressure with confidence instead of anxiety.
Flavor failures: searing, liquid, and the myth of “dump and cook”
The most flavor killing pressure cooker mistakes to avoid all revolve around how you handle browning and liquid. Electric pressure cooking is brilliant at turning tough cuts into tender meals, but it cannot build the same roasted notes unless you use the sauté function aggressively before locking in the steam. If you simply dump ingredients and water into the pot, you will get soft food, not deeply savory cooker food.
Use the sauté mode to sear meat and aromatics until you see a dark fond on the bottom of the inner pot. That browned layer is where the Maillard reaction has concentrated flavor, and when you add a small amount of liquid to deglaze before pressure cooking, those sticky bits dissolve into a rich sauce that will maintain texture and body even after high pressure. Skipping this step is one of the most common mistakes avoid scenarios I see in busy kitchen tests, because people assume pressure alone equals flavor.
Too much liquid is the second big flavor drain in pressure cookers. Remember that during pressure cooking almost no water evaporates, so if you cover ingredients like you would for stovetop cooking, you will end up with a thin broth and washed out food cooking in a bland bath. For stews and braises, start with just enough liquid to reach one third to halfway up the solids, then use the sauté function after you release pressure to reduce and thicken.
Quick release has its place, but relying on it every time is another flavor and texture mistake. When you trigger a fast pressure release, the violent boiling inside the cooker can break apart delicate vegetables, overcook pasta, and make beans split, while a 10 minute natural release pressure phase lets bubbles settle and helps maintain texture. Reserve quick release for short cooking times and fragile ingredients that would overcook if left under residual cooker pressure, such as green vegetables or seafood.
Batch size also changes how flavors develop under cooking pressure. A small 3 litre electric pressure pot will come to pressure and release pressure faster than an 8 litre model, so the same recipe can taste slightly different because of the extra time spent heating and cooling in the larger cooker. In side by side tests, a 1 kg beef chuck stew cooked 25 minutes at high pressure with a 10 minute natural release in a 3 litre cooker, while the same recipe in a 6 litre model needed about 28 minutes plus the same release to reach comparable tenderness.
Material choices matter too, especially if you are comparing stainless steel inner pots with nonstick or hard anodized inserts. For a deeper dive into how cookware surfaces affect food safety and long term cooking routine, you can read this guide on the health implications of hard anodized cookware and then decide which inner pot best fits your kitchen. Whatever you choose, avoid scraping nonstick coatings with metal tools during cooker cooking, because flakes can cloud your sauce and shorten the pot’s lifespan.
One last flavor upgrade that many home cooks miss is using the sauté function after pressure cooking to finish sauces. Once you open pressure safely and the lid is off, switch back to sauté, let excess water boil away, and stir while the sauce thickens and clings to the food, which turns a watery stew into something closer to a slow cooked braise. This small extra time investment pays off in meals that taste like they took all afternoon, even when the total cooking time under pressure was under an hour.
Steam, safety, and smart pressure release habits
High pressure cooking is safe when you respect steam, yet many pressure cooker mistakes to avoid involve the way people handle vents and valves. The cooker is designed to trap steam so that water can exceed its normal boiling point, which shortens cooking times dramatically but also concentrates energy that you must release with care. Treat the pressure release valve like the exhaust on a small engine, not a toy lever to flick casually.
One of the most common safety errors is placing the cooker under low cabinets or next to delicate surfaces. When you perform a quick release, a jet of steam and tiny droplets of hot liquid shoot straight up, and over time that can warp wood, peel paint, or damage kitchen electronics. Always position the pot so the steam vents into open air, and angle the lid away from you when you open pressure after the float valve drops.
Another overlooked habit is cleaning the lid thoroughly after starchy or oily meals. Thick sauces, beans, and pasta can leave residue that creeps into the anti block shield or the pressure release channel, and if you never remove those parts for a proper cooker check, you risk partial blockages that change how the cooker pressure behaves. A monthly deep clean, where you soak the sealing ring, scrub the lid, and run a short water only cycle, will keep steam pathways clear and cooking pressure predictable.
Natural release versus quick release is not just a flavor question, it is a safety one. For large volumes of liquid, such as soups or stocks, using a full natural release pressure phase reduces the risk of hot liquid spurting from the valve, because the internal boiling calms before you touch the control. If you must shorten the process, you can use an intermittent quick release, venting steam in short bursts and pausing whenever you see liquid approaching the vent.
Electric pressure models with canning functions introduce another layer of complexity. If you are considering using an electric pressure canner, read a detailed analysis like this article on the benefits and challenges of using an electric pressure canner before you rely on it for low acid foods, because safe canning depends on precise control of cooker pressure and cooking time. For everyday meals, though, you mainly need to respect fill limits, follow tested recipes, and never bypass safety interlocks or lid sensors.
Data and connectivity raise quieter safety questions that many buyers overlook. Some smart pressure cookers connect to apps and cloud services, so it is worth reading the brand’s privacy policy to understand what information about your cooking routine, appliance usage, or Wi Fi network might be collected. While this does not change how your food cooking turns out, it does affect how comfortable you feel letting the cooker sit always online on your kitchen counter.
Finally, remember that steam burns are both fast and unforgiving. Use long handled tools or a wooden spoon to nudge the quick release lever, keep hands and face away from the vent, and teach every family member how to release pressure safely before they touch the cooker. When you build these habits, the pressure cooker becomes a reliable partner rather than a source of low level anxiety every time you hear the hiss of escaping steam.
Maintenance, models, and building a reliable pressure cooking routine
The last group of pressure cooker mistakes to avoid has nothing to do with recipes and everything to do with maintenance and model choice. Electric pressure cookers are workhorses, but only if you treat the sealing ring, inner pot, and sensors as consumable parts that age with every cooking cycle. Ignoring wear and tear is how a once reliable cooker slowly starts missing pressure targets and stretching cooking times.
The sealing ring deserves special attention, because it handles both cooker pressure and aroma transfer. Over months of pressure cooking, the silicone absorbs strong smells from garlic heavy meals and curry, so many experienced cooks keep one ring for savory dishes and another for neutral or sweet food cooking to maintain texture and flavor clarity. Plan to replace each ring every 12 to 18 months, or sooner if you notice visible cracks, persistent odors, or difficulty reaching full cooking pressure.
Inner pots also vary more than marketing suggests. A stainless steel pot gives you better fond for browning and tolerates metal utensils, while a nonstick insert makes cleanup easier but dislikes high heat sautéing and aggressive scrubbing after sticky cooker cooking. If you want a durable, stovetop capable option that pairs well with an electric base, look at a robust stainless model such as the Duromatic Inox 4 litre multi cooker, which you can see in this detailed pressure cooker test and review that focuses on long term performance.
Model size and features should match your actual meals, not your gadget curiosity. A 3 litre electric pressure cooker is ideal for one or two people and faster cooking times, while a 6 or 8 litre cooker suits families who batch cook grains, beans, and freezer friendly stews. If you routinely cook small portions in a huge pot, the cooker will take longer to reach pressure and release pressure, which can turn a supposed time saver into a sluggish appliance that you stop using on weeknights.
Altitude, ambient temperature, and even how often you open pressure during multi step recipes all shape your real world cooking time. In colder kitchens, the preheat phase stretches out, so what the manual lists as a 20 minute pressure cooking cycle might occupy 35 minutes of clock time once you include heat up and pressure release. Keep a small notebook or digital log of your own cooking times for favorite recipes, because those personal données are more useful than generic charts when you want predictable Tuesday night meals.
Routine maintenance also includes checking the power cord, cleaning the heating plate under the inner pot, and wiping condensation collectors after steamy dishes. A monthly cooker check where you run a simple water test cycle lets you confirm that the cooker pressure builds and drops as expected, and it will alert you early if a sensor or gasket is starting to fail. This habit turns potential surprises into planned part replacements instead of last minute takeout.
Over years of testing, one pattern stands out clearly. The home cooks who get the best results from pressure cookers are not the ones with the most expensive models, but the ones who respect steam, track their own cooking pressure patterns, and treat maintenance as part of their cooking routine rather than an optional chore. In the end, what matters is not the feature list on the box, but whether your pressure cooker quietly delivers reliable, tasty meals on the nights when you are too tired to fuss with anything else.
Key figures on pressure cooking safety and performance
- According to the United States Consumer Product Safety Commission’s public incident data for cooking appliances, reported pressure cooker related incidents dropped significantly after manufacturers added multiple redundant safety valves and lid lock systems, showing that modern electric pressure models are far safer than older stovetop designs.
- Tests by independent kitchen labs and consumer organizations, including side by side comparisons published in magazines such as Cook’s Illustrated and Consumer Reports, have found that pressure cooking can reduce active cooking time for tough cuts of meat by roughly 50 to 70 percent compared with conventional oven braising, which explains why busy households often adopt pressure cookers to reclaim weeknight hours.
- Food safety research from the United States Department of Agriculture (USDA) and the National Center for Home Food Preservation indicates that properly used pressure cookers can reach temperatures above about 115 °C (239 °F) at typical high pressure settings, which is high enough to significantly reduce many harmful bacteria in a fraction of the time required at standard boiling temperatures.
- Consumer surveys from major appliance retailers show that a large share of returned pressure cookers were in working order, and the main reasons for dissatisfaction were confusing controls and inconsistent results, underscoring how user education about cooking times and pressure release matters as much as hardware quality.
- Energy use comparisons published by national energy agencies, including the United States Department of Energy and several European efficiency programs, suggest that pressure cooking can cut electricity or gas consumption for long simmered dishes by around 30 to 60 percent compared with uncovered stovetop cooking, making pressure cookers one of the more efficient tools in a modern kitchen.