Understanding Your Instant Pot's Yogurt Function
Navigating the Yogurt Button
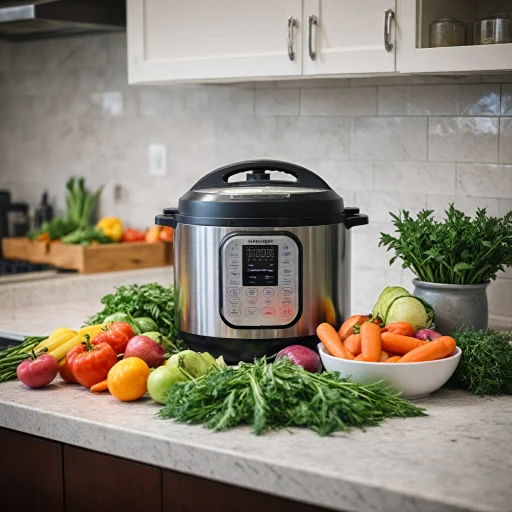
Understanding the yogurt function on your electric pressure cooker, particularly the Instant Pot, can be a game-changer for those looking to create homemade yogurt with ease. The yogurt button is designed to simplify the yogurt making process by automating the incubation period, maintaining a consistent temperature over the necessary time hours to develop active cultures in your milk. When ready to make yogurt, you'll first need to ensure your inner pot is thoroughly cleaned. Residue from previous cooking can impact the yogurt's consistency. Using the inner pot, heat milk to a specific temperature that's ideal for activating the bacteria in your yogurt starter. For an even easier experience, the yogurt function allows the temperature to be precisely controlled once the yogurt starter is added, ensuring that active cultures are cultivated properly. The lid should be securely in place, and you can use the time set by the yogurt button to focus on other tasks while your pot yogurt transforms into creamy goodness. If you're wondering how the yogurt button can fit into other cooking adventures, check out this comprehensive guide for mastering various Instant Pot recipes.Gathering Ingredients and Tools
Essential Ingredients and Tools You'll Need
Before diving into the process of crafting delicious homemade yogurt, it is crucial to gather the necessary ingredients and tools. This preparation sets the stage for smooth yogurt making and helps avoid any mid-process interruptions.
Here's a checklist of essentials:
- Milk: For a rich and creamy texture, choose whole milk. You can experiment with lower-fat options, but it may affect the consistency of your yogurt.
- Yogurt Starter: Use plain yogurt with active cultures or a commercial yogurt starter. This is essential to initiate the fermentation process.
- Instant Pot: Your electric pressure cooker with a yogurt button is critical for maintaining the perfect fermentation temperature. Make sure your model has this feature.
- Inner Pot: The crucial piece where the magic happens. Ensure it's clean, as any residue can affect the taste.
- Instant Read Thermometer: Accurately measures milk temperature, an important step to achieve optimal results.
- Jars with Lids: Perfect for storing your finished product, whether you like it plain or with added flavors and add-ins.
- Whisk or Spoon: Needed for stirring the milk and incorporating the starter evenly.
- Optional: Add-ins for flavor like vanilla extract or honey to enhance the taste.
With all the ingredients and tools ready, you’re all set to start making your homemade yogurt. Preparing the items listed guarantees a hassle-free process and allows you to focus on perfecting your pot yogurt. For further learning on crafting homemade recipes with instant pot, check out this comprehensive guide on mastering lentils with your instant pot.
Step-by-Step Yogurt Making Process
Effortless Steps for Crafting Creamy Homemade Yogurt
Making yogurt at home using your instant pot is not only exciting but also a straightforward process if you follow the right steps. Begin by selecting fresh milk, as the quality of milk directly influences the texture and taste of your yogurt. Whole milk yields a creamier consistency, but feel free to choose the type that suits your diet.
The first step involves heating the milk. Pour the milk into the inner pot and set your instant pot to the 'Sauté' function to bring it to about 180°F. Stir occasionally to prevent scorching. Once reached, it's crucial to let the milk cool down to around 110°F to preserve the active cultures in your yogurt starter, which is essential for the fermentation process.
After cooling, you'll want to incorporate a starter yogurt. Use plain yogurt containing active cultures or a store-bought option as a starter. Mix a few tablespoons into the cooled milk thoroughly while ensuring no lumps for a smooth transition.
Now, it’s time to utilize the impressive 'Yogurt' function on your instant pot. Pour the mixture into the pot and press the yogurt button. Ensure the settings are adjusted to maintain a consistent temperature throughout the fermentation process. In most recipes, it requires about 8 to 12 hours for the yogurt to set suitably.
After the time hours have passed, check the consistency of your pot yogurt. The yogurt should appear firm and slightly jiggly. If you prefer Greek yogurt, consider straining it using a cheesecloth to attain a thicker texture.
For those curious about mastering diverse dishes with your electric pressure cooker, remember that flexibility is key when trying out different yogurt recipes and flavors.
Troubleshooting Common Issues
Overcoming Challenges in Making Yogurt
Making homemade yogurt in your Instant Pot can be a rewarding experience, but you may encounter some challenges along the way. Here are some common issues and tips to troubleshoot them effectively.- Yogurt Not Setting Properly: If your yogurt has not set after the recommended time, it could be due to an incorrect temperature or an insufficient starter. Ensure your yogurt starter contains active cultures and has not expired. Additionally, make sure the milk you use is heated to the right temperature before adding the starter. Double-check that the Instant Pot is set to the right function with the "Yogurt" button.
- Runny Yogurt: This issue often arises from using low-fat or non-dairy milk without proper thickening agents. For a thicker consistency similar to Greek yogurt, consider straining the yogurt in muslin or cheese cloth after it is made or adding milk powder to the mix before incubation.
- Overheating or Burnt Taste: In some cases, the milk might overheat, resulting in a burnt taste. It's essential to stir the milk regularly while heating it in the inner pot and monitor the temperature closely. This will prevent scorching at the bottom of the pot.
- Off Flavors: Ensure all your utensils and the inner pot are thoroughly cleaned before starting. Leftover residue or soap can lead to unpleasant flavors. Additionally, using a fresh yogurt starter each time helps maintain a consistent taste.
- Curdled Texture: If the yogurt appears lumpy or curdled, it might be due to high temperatures or uneven distribution of starter cultures. Make sure the milk cools to the correct temperature before adding the starter and whisk it in thoroughly to ensure even fermentation.
Enhancing Your Yogurt with Flavors and Add-ins
Add-Inspiration for Flavoring Your Yogurt
After you’ve mastered the basics of making yogurt in your pressure cooker, it’s time to get creative! You can elevate your homemade yogurt by adding various flavors and ingredients. This not only enhances the taste but can also improve the texture, making each batch a unique culinary creation. To infuse your yogurt with delightful flavors, consider these simple strategies:- Fruits: Fresh, frozen, or dried fruits can make a fantastic addition. Think slices of ripe bananas, a handful of blueberries, or a dash of raisins. Be sure to add these after the yogurt has cooled to ensure the milk and active cultures remain stable.
- Sweeteners: Enhance the natural creaminess with honey, maple syrup, or agave. Add your chosen sweetener after your yogurt has set, adjusting the quantity to taste.
- Vanilla or Cocoa: For a touch of indulgence, swirl in some vanilla extract or a spoonful of cocoa powder once the yogurt has cooled, avoiding overheating the yogurt starter.
- Spices: A sprinkle of cinnamon or nutmeg can add warmth and complexity to the flavor profile of your pot yogurt.
Storing and Serving Your Homemade Yogurt
Proper Storage Techniques
Once you've successfully made your homemade yogurt using the Instant Pot, storing it correctly is crucial to maintain its freshness and flavor. After the yogurt has set and cooled to room temperature, transfer it from the inner pot to clean, airtight containers or jars. This will help preserve the active cultures and prevent any unwanted flavors from seeping in. Make sure to seal the lids tightly.
Refrigeration and Shelf Life
Place the sealed jars in the refrigerator. Homemade yogurt will typically last for about one to two weeks when stored properly. The cooler temperature slows down the activity of the cultures, keeping your yogurt fresh. If you notice any off smells or mold, it's best to discard it.
Serving Suggestions
When you're ready to enjoy your homemade yogurt, you can serve it plain or enhance it with various flavors and add-ins. Consider mixing in fresh fruits, honey, or granola for a delicious and nutritious treat. If you prefer a thicker consistency, like Greek yogurt, you can strain the yogurt using a cheesecloth to remove excess whey.
Using Yogurt as a Starter
Remember, a portion of your homemade yogurt can be used as a starter for your next batch. This is a great way to continue making yogurt without needing to purchase a new starter each time. Simply reserve a small amount before adding any flavors or sweeteners.
Tips for Easy Serving
To make serving easier, consider dividing the yogurt into individual portions before refrigerating. This not only makes it convenient but also helps in maintaining the yogurt's quality as you won't need to open the entire container each time.

