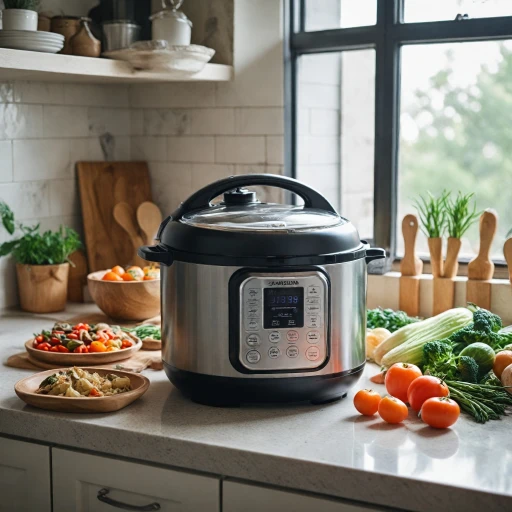
Understanding the Basics of Instant Pot Yogurt
Grasping the Method of Yogurt Creation with Instant Pot
Understanding the essentials of making yogurt in your Instant Pot is key to harnessing its potential fully. Whether you prefer a creamy Greek yogurt or a light milk yogurt, starting with the right process is crucial. The Instant Pot's yogurt setting simplifies the once complex task of making homemade yogurt, ensuring consistent results every time. The process typically begins by heating milk to a specific temperature. Pasteurized milk works best for this method, but raw milk can also be used with some precautions. Consistency is central to success—ensure the container inside, often referred to as the inner pot, is meticulously clean. Pour the milk into the inner pot and select the appropriate setting on your Instant Pot, usually designated with the yogurt button. After heating, allow the milk to cool to the proper temperature before adding your chosen starter culture. Many find success with store-bought yogurt containing active cultures as their starter. Carefully mix the starter into the milk, ensuring it's evenly distributed throughout the mixture. The next phase involves patience, as the mixture needs several hours to rest and develop. During this time, the bacterial cultures work their magic, transforming the milk into yogurt within the cozy confines of your Instant Pot. Closely monitor the time, as leaving it too long or too short can affect the resulting texture and taste. Once the process completes, your homemade yogurt is ready but not quite finished. Consider straining the yogurt through a yogurt strainer to achieve the desired thickness, which is especially useful if you're aiming for a Greek yogurt consistency. After straining, transfer the yogurt to the fridge to cool down and firm up before serving. By understanding these basic steps, you can prevent many common pitfalls and enjoy the heath benefits of homemade yogurt. And don't worry about occasional issues that may arise—you'll find it easier to troubleshoot, ensuring your pot yogurt journey is as smooth as a spoonful of creamy joy. For those interested in enhancing their culinary prowess, mastering garbanzo beans with your electric pressure cooker can be a delightful next step.Learn more about on-demand cooking insights here.Essential Ingredients and Tools
Gathering Your Ingredients and Tools
To craft the perfect homemade yogurt using your Instant Pot, you'll need to start with the right ingredients and tools. This ensures a smooth process and delicious results. Here's what you'll need:
- Milk: You can use whole, skim, or even raw milk. Pasteurized milk is commonly used, but raw milk can also be an option if you prefer. The choice of milk will affect the texture and flavor of your yogurt.
- Yogurt Starter: This is essential for introducing active cultures to your milk. You can use a store-bought yogurt with live cultures or a specific starter culture. Ensure it contains active cultures for the best results.
- Instant Pot: Your Instant Pot is the key tool here. Make sure it has a yogurt button or setting, as this will simplify the process significantly.
- Inner Pot: The inner pot of your Instant Pot is where the magic happens. Ensure it's clean and dry before starting.
- Yogurt Strainer: If you're aiming for Greek yogurt, a yogurt strainer will help you strain the whey and achieve that thick, creamy texture.
- Thermometer: A kitchen thermometer is handy for checking the temperature of your milk, ensuring it's at the right level before adding your starter.
Preparing Your Ingredients
Before you begin, it's important to prepare your ingredients properly:
- Heat Milk: Pour your chosen milk into the inner pot. Using the sauté setting, heat the milk to about 180°F. This step helps to kill any unwanted bacteria and prepares the milk proteins for fermentation.
- Cool Milk: After heating, allow the milk to cool to around 110°F. This is the optimal temperature for adding your yogurt starter.
- Add Starter: Once the milk has cooled, add your yogurt starter. Stir gently to mix the starter evenly throughout the milk.
With these ingredients and tools ready, you're all set to move on to the next step in the yogurt-making process. For more detailed guidance on preparing ingredients, you might find this resource helpful.
Step-by-Step Yogurt Making Process
Craft the Ideal Procedures for Delicious Yogurt
Starting the yogurt-making process in your Instant Pot is both an art and science. Assembling the right sequence of steps will harness the benefits of milk and active cultures to produce delightful homemade yogurt. Firstly, pour your chosen milk into the inner pot of the Instant Pot. Whether using pasteurized or raw milk, the difference boils down to personal preference. Heat milk to a temperature of around 180°F to 185°F. This crucial step helps not only to kill any bacteria that may disrupt the formation of yogurt but also denatures proteins for the perfect yogurt consistency. Once heated, allow to cool down to about 110°F. It is crucial that the milk is at this temperature before adding any yogurt starter, as this provides an optimal environment for active cultures to thrive. Introduce your chosen yogurt starter or a bit of store-bought yogurt with live cultures into the warm milk, ensuring even distribution. This will cultivate the active ingredients essential for yogurt consistency and flavor. Secure the lid of your Instant Pot and select the yogurt setting. This typically involves adjusting the time to anywhere between 8 to 12 hours based on your taste preferences; a longer fermentation (10-12 hours) results in tangier yogurt. Patience is a virtue here, as the beautiful transformation from milk to pot yogurt occurs gradually. Upon completion, you might need to consider straining the yogurt if you desire a thicker, Greek yogurt consistency. Using a reliable yogurt strainer helps separate the whey from the milk yogurt, giving you the best homemade Greek yogurt experience! Lastly, chill your freshly made yogurt in the fridge for several hours before consumption. It enhances the flavor profile and assists in achieving the quintessential texture customers expect from yogurt instant pot recipes. For those looking to further their culinary adventures with an Instant Pot, exploring more like mastering lentil dishes using a rice cooker can provide expanded kitchen horizons.Troubleshooting Common Issues
Overcoming Challenges in Yogurt Production
Crafting the perfect homemade yogurt in your Instant Pot can sometimes be fraught with unexpected challenges. To simplify this process, recognize common issues that may arise and the best ways to tackle them for a smoother experience.Dealing with Runny Yogurt
If your pot yogurt ends up more liquid than you'd hoped, the issue could lie in the milk or the starter culture used. Opting for skim milk or low-fat milk can lead to a thinner consistency. Consider:- Using whole or pasteurized milk for better texture.
- Ensure your yogurt starter is fresh and contains active cultures. The culture is key to transforming your pot of milk into creamy yogurt.
Managing Over-Fermentation
Considering how tempting it might be to let the mix ferment longer for a tangier flavor, over-fermentation can cause your milk yogurt to curdle or separate. To prevent this:- Consistently check as the hours progress, especially as it nears completion.
- Using the yogurt button on your Instant Pot, adhere to recommended time settings.
Avoiding Burning or Scorching
The process of heating milk can sometimes lead to scorching, resulting in an unpleasant taste:- Before heating, make sure to stir continuously for even heat distribution in the inner pot.
- After reaching the desired temperature, transport from heat immediately to avoid scorching.
Curbing Unpleasant Smells
If you're encountering strange odors during the making yogurt process, it could stem from improper cleaning or storage. To maintain fresh, appealing yogurt:- Keep the inner pot and the Instant Pot lid thoroughly cleaned.
- Store homemade yogurt in the fridge right away after cooling.
Enhancing Your Yogurt Experience
Elevating Your Yogurt Experience
Once you've mastered the basic yogurt recipe with your Instant Pot, it's time to explore ways to enhance your homemade yogurt. Here are some tips and tricks to take your yogurt-making skills to the next level.
- Experiment with Milk Types: While pasteurized milk is commonly used, trying raw milk or skim milk can offer different textures and flavors. Each type of milk will bring a unique taste to your milk yogurt.
- Adjust the Fermentation Time: The yogurt setting on your Instant Pot allows you to control the fermentation time. Longer fermentation results in a tangier yogurt. Experiment with different hours to find your preferred taste.
- Use Different Starter Cultures: The choice of yogurt starter can significantly impact the flavor and texture. Try using different active cultures or even store bought yogurt as a starter culture to see what works best for you.
- Strain for Greek Yogurt: To make Greek yogurt, use a yogurt strainer to remove excess whey. This will give you a thicker, creamier consistency. Simply place the yogurt in the strainer and let it sit in the fridge for a few hours.
- Add Flavors and Sweeteners: Once your yogurt is ready, you can add fruits, honey, or vanilla for a personalized touch. This is a great way to make your yogurt more appealing to kids or those with a sweet tooth.
- Proper Storage: Store your homemade yogurt in the inner pot with a lid or transfer it to airtight containers. This will keep it fresh for up to two weeks in the fridge.
By experimenting with these techniques, you can create a yogurt that not only suits your taste but also offers the health benefits of homemade yogurt. Enjoy the process of making yogurt and the satisfaction of crafting a delicious, nutritious treat at home.
Health Benefits of Homemade Yogurt
The Nutritional Boost of Homemade Yogurt
Creating your own yogurt at home not only allows you to control the ingredients but also provides several health benefits. When you use a quality yogurt starter with active cultures, you can ensure that your homemade yogurt will be rich in probiotics, which are beneficial bacteria that support gut health. Store-bought options may not always offer the same level of probiotics.
Using ingredients like raw milk or pasteurized milk in your instant pot gives you the flexibility to craft the best milk yogurt suited to your dietary needs. Raw milk can contain additional nutrients and enzymes that some people find beneficial, although pasteurized milk is considered safer by many health professionals due to the elimination of harmful bacteria.
Homemade yogurt made with an instant pot can be customized to suit your taste and nutritional goals. For example, create a thicker Greek yogurt by using a yogurt strainer to remove excess whey. This will not only enhance the texture but also increase the protein content.
Improved Digestion and Immune Support
The active cultures found in homemade yogurt are known to aid in digestion and improve gut microbiota balance. This can contribute to better digestive health and may even enhance your immune system. The fermentation process facilitated by the yogurt setting on your instant pot helps break down lactose, making it easier for those with lactose intolerance to enjoy the creamy goodness of slowly fermented yogurt.
Customizing for Maximum Benefit
Adjusting the composition of your homemade yogurt by experimenting with different milk types, such as skim milk, can result in a lower fat content, which is ideal if you're watching your calorie intake. By controlling the yogurt recipe, you can avoid additives and extra sugars often found in commercially produced yogurts.
Simply heat the milk to the desired temperature, add your chosen yogurt starter, and strain the final product as needed. Let the mixture sit for a few hours, and you’ll have a naturally fermented treat ready for your fridge.
Moreover, making yogurt at home allows to accommodate dietary preferences or restrictions. Whether you prefer your pot yogurt creamy or strained to thick Greek yogurt consistency, you have all the tools at your disposal to make the best-tasting, nutritious yogurt.
